本記事について
本記事では、Fortinet 社のファイアウォール製品である FortiGate について、クライアント・拠点間で IPsec VPN 接続を確立し、クライアントから拠点内ネットワークにアクセスすることを可能とするための設定方法を説明します。
FortiOS 7.6.3 からはすべてのモデルで SSL VPN トンネルモードがサポートされなくなったため、これ以降のバージョンでは SSL VPN の代わりに本記事で説明する IPSec VPN によるリモートアクセスを使用する必要があります。
動作確認環境
本記事の内容は以下の機器にて動作確認を行った結果に基づいて作成されています。
- FortiGate-60F
- FortiOS 7.6.6
- FortiClient VPN
- 7.4.3.4726
前提
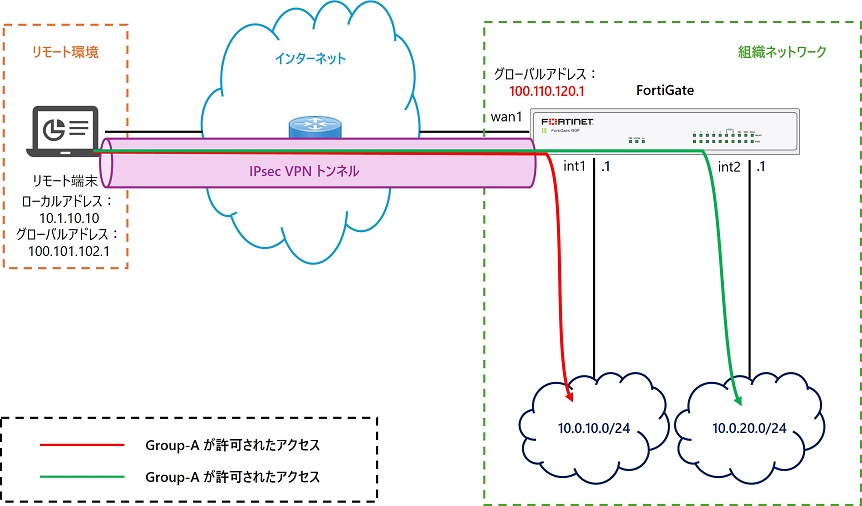
本記事では、以下画像の様にリモート環境に存在するリモート端末からインターネットを介して組織ネットワーク内の FortiGate と IPsec VPN トンネルを確立し、IPsec VPN トンネルを通してリモート端末が組織内部ネットワークにアクセスすることを要件とします。なお、本記事では認証方法として FortiGate で設定したローカルユーザを使用します。
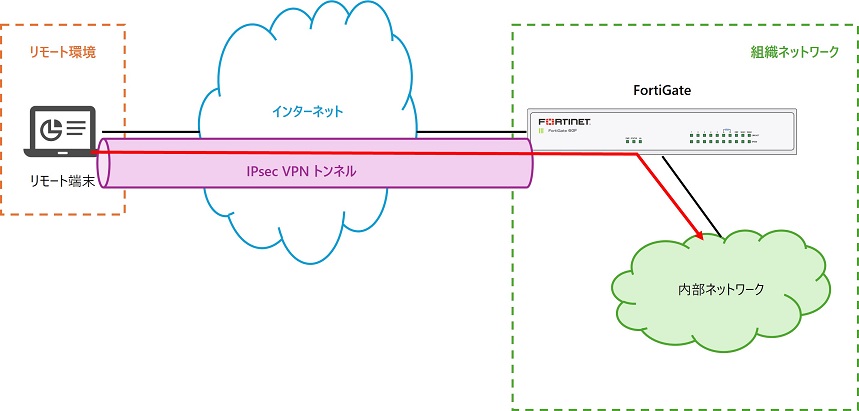
リモート端末では VPN クライアントソフトとして FortiClient VPN を使用します。
FortiClient 7.4.4 以降、クライアント側で IKEv1 はサポートされなくなりました。
このため FortiClient 7.4.4 以降を導入する場合は、IKEv2 を使用してください。
無料で利用できる FortiClient VPN については 2026/6 時点の最新バージョンは 7.4.3 です
また、本記事では以下の検証環境を想定した設定例を掲載しています。
- FortiGate は直接 WAN 回線に接続しグローバルアドレスを持つ

初期設定については CLI での設定を推奨
Web 検索するとすぐ見つかる Fortinet 社の日本語設定ガイドでは、GUI の VPN ウィザードを使用した設定方法が説明されています。この方法は手軽に設定できる一方、各オブジェクトが自動で作成された上で VPN 設定に紐づけられることになるため、設定管理が難しくなります。
このため設計構築案件としてリモートアクセス VPN を設計する場合は VPN ウィザードではなく CLI で手動で設定することを前提として設計することをお勧めします。
本記事では CLI を使用した設定方法を説明します。
①事前設定
まずはリモートアクセス IPsec VPN 設定の前に必要な事前設定を行います。
インターフェース基本設定
使用するインターフェースの IP アドレス等の基本設定を行います。
ルーティング設定
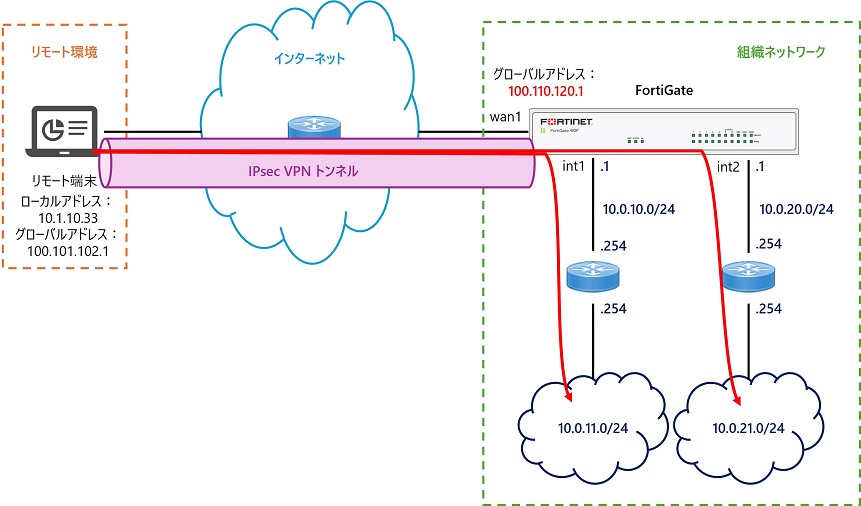
クライアント向け(インターネット向け)のルーティング、内部ネットワーク向けのルーティングが必要となるため、本記事では以下のスタティックルートを設定します。
config router static
    edit 1
        set gateway 100.110.120.2
        set device "wan1"
    next
    edit 2
        set dst 10.0.11.0 255.255.255.0
        set gateway 10.0.10.254
        set device "internal1"
    next
    edit 3
        set dst 10.0.21.0 255.255.255.0
        set gateway 10.0.20.254
        set device "internal2"
    next
endアドレスオブジェクト設定
IPsec VPN 設定やファイアウォールポリシー設定でアドレスオブジェクトが必要になるため、あらかじめ作成しておきます。
まずクライアントのアクセス先となる内部セグメントのアドレスオブジェクトを作成します。本記事の例では「10.0.11.0/24」「10.0.21.0/24」にアクセスさせるためこの2つのオブジェクトを作成します。なお次にこれらをまとめたアドレスグループを作成するため、このアドレスオブジェクトのインターフェースはデフォルト「any」にします。
config firewall address
    edit "10.0.11.0/24"
        set subnet 10.0.11.0 255.255.255.0
    next
    edit "10.0.21.0/24"
        set subnet 10.0.21.0 255.255.255.0
    next
end
また VPN クライアントに配布するアドレス範囲を示すIP範囲タイプのオブジェクトを作成します。本記事では「192.168.20.10-200」を対象範囲とします。このアドレスオブジェクトのインターフェースはデフォルト「any」にします。
config firewall address
    edit "VPN-Client_Range"
        set type iprange
        set start-ip 192.168.20.10
        set end-ip 192.168.20.200
    next
end
VPN クライアントに配布するアドレス範囲を示すアドレスオブジェクトのタイプは IP範囲 (iprange) である必要があります。サブネットタイプだと後の VPN 設定で指定できないため注意してください。
アドレスグループ設定
VPN クライアントからの通信のうち特定のネットワーク宛通信のみ VPN トンネル宛にルーティングさせる機能である VPN のスプリットトンネル設定にて、対象の宛先ネットワークを指定することになります。この対象はアドレスオブジェクトで指定しますが、アドレスグループで指定すると便利なためこれ用のアドレスグループを作成します。
前項目で作成した VPN クライアントの宛先となるアドレスオブジェクトを含むアドレスグループを作成します。
config firewall addrgrp
    edit "VPNSplit_AddrGrp"
        set member "10.0.11.0/24" "10.0.21.0/24"
    next
end
このアドレスグループに含めたネットワークへのルートが、VPN クライアントのルーティングテーブルに自動でインストールされることになります。これにより VPN クライアントからの指定したネットワーク宛の通信は VPN トンネル向けにルーティングされるようになります。
②ユーザとユーザグループの設定
VPN 接続時の認証で使用するユーザとユーザグループを作成します。
ユーザの設定
必要数だけユーザを作成します。
設定コマンドは以下の通りです。
config user local
    edit "<ユーザ名>"
        set status enable
        set type password
        set passwd <ユーザのパスワードを入力>
    next
end
以下は本記事の設定例です。
config user local
    edit "vpnuser01"
        set status enable
        set type password
        set passwd vpnuser01
    next
    edit "vpnuser02"
        set status enable
        set type password
        set passwd vpnuser02
    next
end
ユーザグループの設定
ユーザ作成後、ユーザをまとめたユーザグループを作成します。
設定コマンドは以下の通りです。
config user group
    edit "<グループ名>"
        set group-type firewall
        set member <ユーザ名を半角スペース区切りで入力>
    next
end
以下は本記事の設定例です。
config user group
    edit "vpn-group"
        set group-type firewall
        set member "vpnuser01" "vpnuser02"
    next
end「set group-type firewall」はデフォルト値のため設定後のコンフィグには表示されません。
③リモートアクセスIPsec VPNの設定
IPsec VPN の設定はフェーズ1、フェーズ2の2段階の設定を行います。
なお、IPsec VPN で使用する IKE にはバージョンとして IKEv1 と IKEv2 の2つがありますが、FortiClient VPN のサポート状況を考えると今後は IKEv1 は使えなくなることが予想されるため、IKEv2 を推奨します。
IPsecフェーズ1インターフェース設定
まず「config vpn ipsec phase1-interface」にてフェーズ1の設定を行います。
主な設定項目は以下表の通りです。デフォルトから変更する必要がある項目のみ設定すればOKです。
| # | 設定項目 | デフォルト値 | 値選択肢 ※赤字推奨 | 備考 |
|---|---|---|---|---|
| 1 | edit | ― | 任意の文字列 ※15文字以内 | edit設定名 |
| 2 | type | static | dynamic | リモート機器のタイプ リモートアクセスの場合はdynamic |
| 3 | interface | ― | wan側のIF | IPsecを受け付けるインターフェース |
| 4 | ip-version | 4 | 4 6 | IPバージョン 通常は4で良い |
| 5 | local-gw | 0.0.0.0 | x.x.x.x | ローカルゲートウェイアドレス デフォルトの 0.0.0.0 で良い |
| 6 | ike-version | 1 | 1 2 | IKEバージョン 本記事では2を前提とします |
| 7 | authmethod | psk | psk signature | 認証方式 通常は事前共有鍵の psk で良い |
| 8 | peertype | any | any one dialup | 対向機器タイプ 通常はany |
| 9 | net-device | disable | enable disable | GUI の「デバイスの作成」 通常デフォルトのdisableで良い |
| 10 | mode-cfg | disable | enable disable | VPNウィザードで設定した場合 デフォルトはenable リモートクライアントの設定自動化、 スプリットトンネル等のために必要 |
| 11 | proposal | aes128-sha256 aes256-sha256 aes128gcm-prfsha256 aes256gcm-prfsha384 chacha20poly1305-prfsha256 | 本表の下に記載 | 使用アルゴリズム 推奨:aes256-sha512 FortiClient VPN 7.4.3のデフォルトは以下 aes128-sha1 aes256-sha256 |
| 13 | dpd | on-idle | disable on-idle on-demand | IPsecのDPD機能の有効/無効 VPNウィザードで設定した場合 デフォルトはon-demand |
| 14 | comments | ― | 任意の文字列 | コメント入れたい場合のみ設定 |
| 15 | dhgrp | 20 21 | 1 2 5 14 15 16 17 18 19 20 21 27 28 29 30 31 32 | DHグループ 推奨:20 FortiClient VPN 7.4.3のデフォルトは20 ※FortiClient VPN 7.4.3.4726では 27 以降は未サポートです |
| 16 | eap | disable | enable disable | VPNウィザードで設定した場合 デフォルトはenable |
| 17 | eap-identity | ― | use-id-payload send-request | VPNウィザードで設定した場合 デフォルトはsend-request |
| 18 | wizard-type | custom | custom dialup-forticlient 他 | VPNウィザードで設定した場合 dialup-forticlientになる |
| 19 | authusrgrp | ― | ユーザグループ名 | 事前設定で作成しておいた ユーザグループを指定する。 ポリシー設定でグループを指定し グループ別の通信制御をする場合は 未設定のままとする。 |
| 20 | encapsulation | none | none vpn-id-ipip | GRE/VXLAN/VPNIDカプセル化 デフォルトのnoneで良い |
| 21 | nattraversal | enable | enable disable | NAT越えが無ければdisableにする |
| 22 | keepalive | 10 | 5-900 | NATトラバーサルキープアライブ間隔 |
| 23 | transport | auto | udp auto tcp | トランスポート autoの場合UDPでアクセス不可の場合 TCPにフォールバックするが 通信制御の観点でUDPに固定が推奨 |
| 24 | fortinet-esp | disable | enable disable | transport auto の場合のみ設定可能 「Fortinet カプセル化を使用する」 に対応 |
| 25 | remote-gw-match | any | any ipmask iprange geography ztna | リモートゲートウェイマッチング デフォルトの any で良い |
| 26 | assign-ip-from | range | range (手動指定) usrgrp dhcp name (object指定) | クライアントIP範囲の指定方法 アドレスオブジェクトで指定する name を推奨 |
| 27 | ipv4-name | ― | クライアントIP範囲を 示すオブジェクト | 事前設定で作成した クライアントIP範囲オブジェクトを指定 |
| 28 | ipv4-start-ip | ― | IP範囲の最初 | クライアントIP範囲を手動指定する場合 最初のアドレスを指定 |
| 29 | ipv4-end-ip | ― | IP範囲の最後 | クライアントIP範囲を手動指定する場合 最後のアドレスを指定 |
| 30 | ipv4-netmask | ― | IP範囲のnetmask | IP範囲のサブネットマスクを指定 |
| 31 | dns-mode | manual | manual auto | VPNウィザードで設定した場合 デフォルトはauto (システムDNSを使う) |
| 32 | ipv4-split-include | ― | アドレスグループ名 | スプリットトンネル対象の アドレスグループを指定 ※指定アドレスのみVPNを通る |
| 33 | save-password | disable | enable disable | パスワードの保存 VPNウィザードで設定した場合 デフォルトはenable |
| 34 | psksecret | ― | 事前共有鍵文字列 | 事前共有鍵 |
| 35 | keylife | 86400 | 120-172800 (秒) | キーの有効期間 基本デフォルトでOK 要件次第で調整 |
| 36 | reauth | disable | enable disable | キー有効期限切れ時の再認証要否 通常 disable でOK 再認証させたい場合 enable にする |
| 37 | keepalive | 10 | 5-900 | キープアライブ頻度 |
| 38 | dpd-retrycount | 3 | 1-10 | DPDリトライ回数 |
| 39 | dpd-retryinterval | 60 (CLI) 20 (GUI) | 0-3600 | DPDリトライ間隔 VPNウィザードで設定した場合 デフォルトは20 |
| 40 | fec-egress fec-ingress | disable | enable disable | 前方誤り訂正イーグレス 前方誤り訂正イングレス |
proposal の選択肢は以下です。
des-md5
des-sha1
des-sha256
des-sha384
des-sha512
3des-md5
3des-sha1
3des-sha256
3des-sha384
3des-sha512
aes128-md5
aes128-sha1
aes128-sha256
aes128-sha384
aes128-sha512
aes128gcm-prfsha1
aes128gcm-prfsha256
aes128gcm-prfsha384
aes128gcm-prfsha512
aes192-md5
aes192-sha1
aes192-sha256
aes192-sha384
aes192-sha512
aes256-md5
aes256-sha1
aes256-sha256
aes256-sha384
aes256-sha512
aes256gcm-prfsha1
aes256gcm-prfsha256
aes256gcm-prfsha384
aes256gcm-prfsha512
chacha20poly1305-prfsha1
chacha20poly1305-prfsha256
chacha20poly1305-prfsha384
chacha20poly1305-prfsha512
aria128-md5
aria128-sha1
aria128-sha256
aria128-sha384
aria128-sha512
aria192-md5
aria192-sha1
aria192-sha256
aria192-sha384
aria192-sha512
aria256-md5
aria256-sha1
aria256-sha256
aria256-sha384
aria256-sha512
seed-md5
seed-sha1
seed-sha256
seed-sha384
seed-sha512
以下は設定例です。デフォルト値の項目は省略しています。
config vpn ipsec phase1-interface
    edit "RemoteVPN_01"
        set type dynamic
        set interface "wan1"
        set ike-version 2
        set peertype any
        set net-device disable
        set mode-cfg enable
        set proposal aes128-sha256 aes256-sha256 aes128gcm-prfsha256 aes256gcm-prfsha384 chacha20poly1305-prfsha256
        set dhgrp 20 21
        set eap enable
        set eap-identity send-request
        set wizard-type dialup-forticlient
        set authusrgrp "vpn-group"
        set transport udp
        set assign-ip-from name
        set ipv4-netmask 255.255.255.0
        set dns-mode auto
        set ipv4-split-include "VPNSplit_AddrGrp"
        set ipv4-name "VPN-Client_Range"
        set save-password enable
        set psksecret vpnpassword
    next
end
フェーズ1設定をすると以下のようなインターフェース設定が自動で追加されます。
config system interface
    edit "RemoteVPN_01"
        set vdom "root"
        set type tunnel
        set snmp-index 16
        set interface "wan1"
    next
end
IPsecフェーズ2インターフェース設定
次に「config vpn ipsec phase2-interface」にてフェーズ2の設定を行います。
主な設定項目は以下表の通りです。デフォルトから変更する必要がある項目のみ設定すればOKです。
| # | 設定項目 | デフォルト値 | 設定値 ※赤字推奨 | 備考 |
|---|---|---|---|---|
| 1 | edit | ― | 任意の文字列 | edit設定名 フェーズ1のedit名と同名を推奨 |
| 2 | phase1name | ― | フェーズ1のedit名 | vpn ipsec phase1-interface のどのeditと紐づけるかを指定 |
| 3 | proposal | aes128-sha1 aes256-sha1 aes128-sha256 aes256-sha256 aes128gcm aes256gcm chacha20poly1305 | 本表の下に記載 | 使用アルゴリズム 推奨:aes256-sha512 FortiClient VPN 7.4.3のデフォルトは以下 aes128-sha1 aes256-sha256 |
| 4 | pfs | enable | enable disable | パーフェクト・フォワード・シークレシー(PFS) デフォルトのenableでOK |
| 5 | dhgrp | 20 21 | 1 2 5 14 15 16 17 18 19 20 21 27 28 29 30 31 32 | DHグループ 推奨:20 FortiClient VPN 7.4.3のデフォルトは20 ※FortiClient VPN 7.4.3.4726では 27 以降は未サポートです |
| 6 | replay | enable | enable disable | リプレイ検出 デフォルトの enable で良い |
| 7 | keepalive | disable | enable disable | オートキープアライブ |
| 8 | add-route | phase1 | phase1 enable disable | 自動ルート追加 phase1⇒フェーズ1の設定に従う phase1ではデフォルトenable |
| 9 | inbound-dscp-copy | phase1 | phase1 enable disable | ESPヘッダー内のDSCPを 内部IPヘッダーにコピーする機能 phase1⇒フェーズ1の設定に従う |
| 10 | auto-discovery-sender | phase1 | phase1 enable disable | ショートカットメッセージの送信を有効/無効 phase1⇒フェーズ1の設定に従う |
| 11 | auto-discovery-forwarder | phase1 | phase1 enable disable | ショートカットメッセージの転送を有効/無効 phase1⇒フェーズ1の設定に従う |
| 12 | keylife-type | seconds | seconds kbs both | キーの有効期間の単位 |
| 13 | single-source | disable | enable disable | 単一送信元IPアドレス制限を有効/無効 |
| 14 | route-overlap | use-new | use-old use-new allow | 重複する経路に対する対策 use-new ⇒古いルートを削除して、新しいルートを追加 |
| 15 | encapsulation | tunnel-mode | tunnel-mode transport-mode | カプセル化方式 |
| 16 | comments | ― | 任意の文字列 | コメントが必要なら設定 |
| 17 | initiator-ts-narrow | disable | enable disable | IKEv2イニシエータのトラフィックセレクターの 絞り込みを有効/無効 |
| 18 | diffserv | disable | enable disable | DSCP 適用 |
| 19 | protocol | 0 | 0-255 | プロトコル 0 ⇒ すべて |
| 20 | src-addr-type | subnet | subnet range ip name subnet6 range6 ip6 name6 | ローカルプロキシIDのタイプ |
| 21 | src-port | 0 | 0-65535 | ローカルポート 0 ⇒ すべて |
| 22 | dst-addr-type | subnet | subnet range ip name subnet6 range6 ip6 name6 | リモートプロキシIDのタイプ |
| 23 | dst-port | 0 | 0-65535 | リモート ポート 0 ⇒ すべて |
| 24 | keylifeseconds | 43200 | 120-172800 | キーの有効期間 基本デフォルトでOK 要件次第で調整 |
| 25 | src-subnet | 0.0.0.0 0.0.0.0 | <IP> <Subnet> | ローカルプロキシID リモートアクセスの場合デフォルトでOK |
| 26 | dst-subnet | 0.0.0.0 0.0.0.0 | <IP> <Subnet> | リモートプロキシID リモートアクセスの場合デフォルトでOK |
proposal の選択肢は以下です。
null-md5
null-sha1
null-sha256
null-sha384
null-sha512
des-null
des-md5
des-sha1
des-sha256
des-sha384
des-sha512
3des-null
3des-md5
3des-sha1
3des-sha256
3des-sha384
3des-sha512
aes128-null
aes128-md5
aes128-sha1
aes128-sha256
aes128-sha384
aes128-sha512
aes128gcm
aes192-null
aes192-md5
aes192-sha1
aes192-sha256
aes192-sha384
aes192-sha512
aes256-null
aes256-md5
aes256-sha1
aes256-sha256
aes256-sha384
aes256-sha512
aes256gcm
chacha20poly1305
aria128-null
aria128-md5
aria128-sha1
aria128-sha256
aria128-sha384
aria128-sha512
aria192-null
aria192-md5
aria192-sha1
aria192-sha256
aria192-sha384
aria192-sha512
aria256-null
aria256-md5
aria256-sha1
aria256-sha256
aria256-sha384
aria256-sha512
seed-null
seed-md5
seed-sha1
seed-sha256
seed-sha384
seed-sha512
以下は設定例です。デフォルト値の項目は省略しています。
config vpn ipsec phase2-interface
    edit "RemoteVPN_01"
        set phase1name "RemoteVPN_01"
        set proposal aes128-sha1 aes256-sha1 aes128-sha256 aes256-sha256 aes128gcm aes256gcm chacha20poly1305
        set dhgrp 20 21
    next
end
④ファイアウォールポリシー設定
最後にリモート端末から内部ネットワークへの IPsec VPN トンネルを介した通信を許可するファイアウォールポリシーを設定します。
本記事の検証環境では以下のように FortiGate の internal1 先のサブネットと internal2 先のサブネットに通信が発生するため、2つのファイアウォールポリシー設定します。
ファイアウォールポリシー設定のポイントは以下の通りです。
- 着信インターフェースは IPsec VPN 設定に対応した仮想インターフェースにする
- 本記事の例では「RemoteVPN_01」
- 仮想インターフェースは IPsec VPN を設定すると自動で作成されます
- 送信元アドレスは IPsec VPN クライアント用の配布 IP 範囲に対応して作成した IP 範囲タイプのアドレスオブジェクトにする
- SSL-VPNでは必要だったユーザグループ(set group)の設定は不要。設定するとポリシーに合致しなくなる
- ただしユーザグループ別の通信制御を行う場合は後述のオプションデザインパターン参照
- その他は通常のファイアウォールポリシーと同様の観点で設定する
config firewall policy
    edit 3
        set name "VPNClient_to_internal1"
        set srcintf "RemoteVPN_01"
        set dstintf "internal1"
        set action accept
        set srcaddr "VPN-Client_Range"
        set dstaddr "10.0.11.0/24"
        set schedule "always"
        set service "ALL"
        set logtraffic all
    next
    edit 4
        set name "VPNClient_to_internal2"
        set srcintf "RemoteVPN_01"
        set dstintf "internal2"
        set action accept
        set srcaddr "VPN-Client_Range"
        set dstaddr "10.0.21.0/24"
        set schedule "always"
        set service "ALL"
        set logtraffic all
    next
end
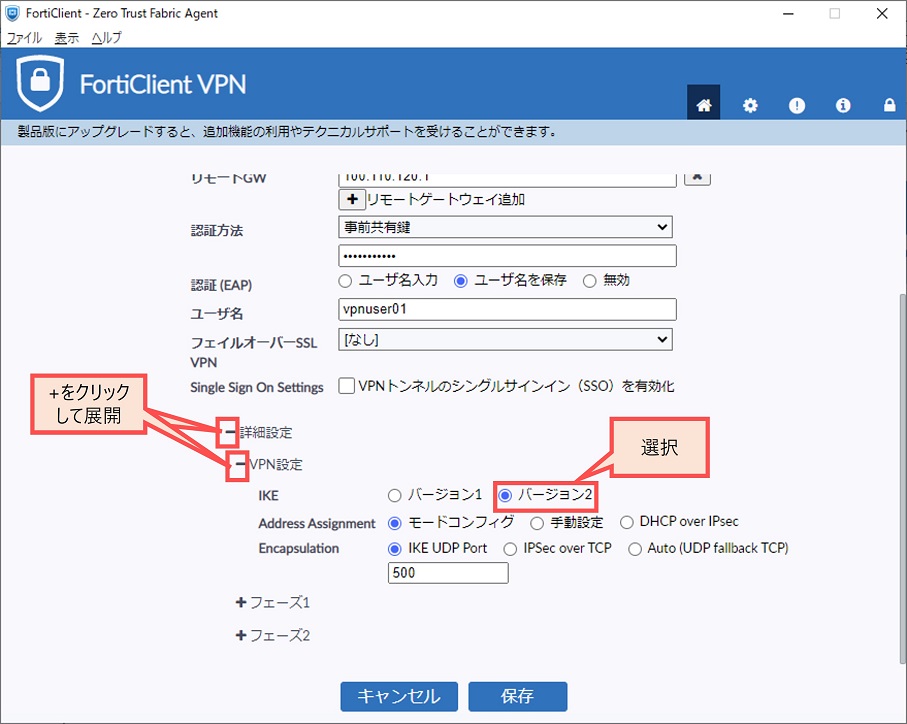
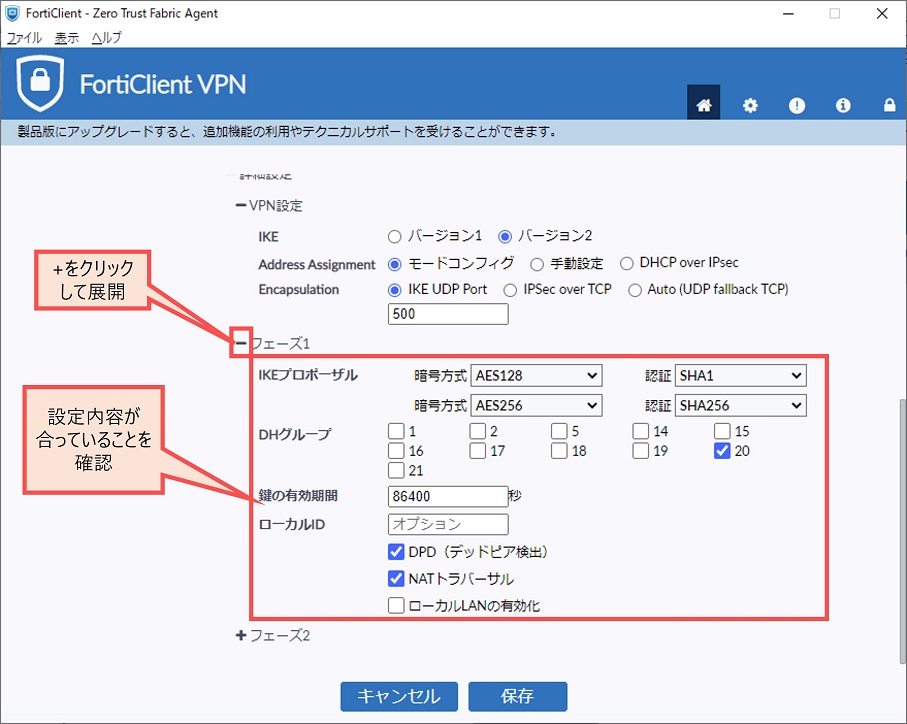
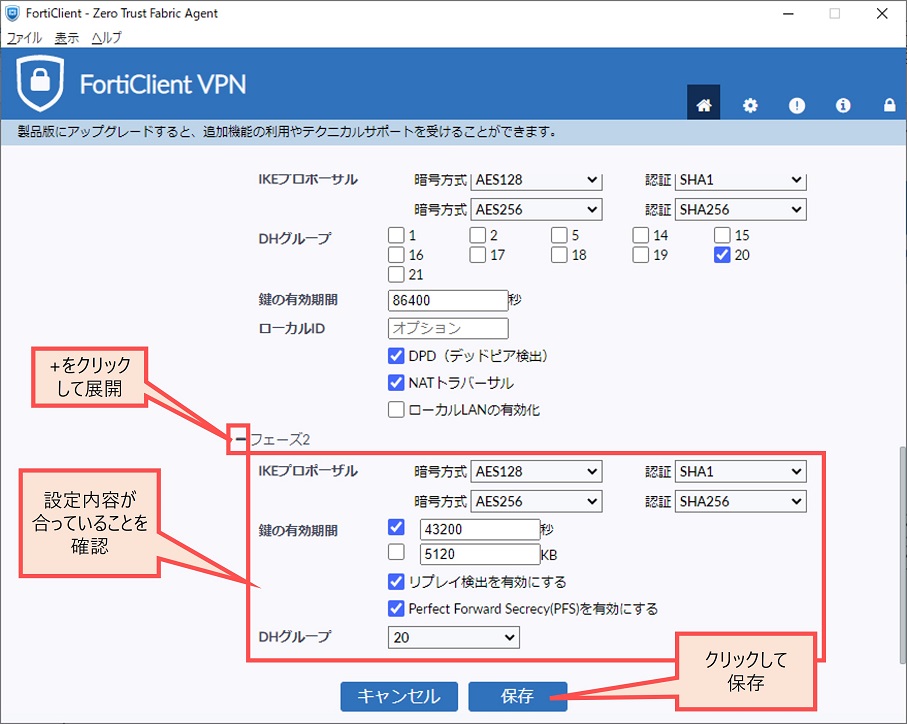
FortiClient VPN での IPsec VPN 設定と接続
以下ページから FortiClient VPN のオンラインインストーラをダウンロードします。
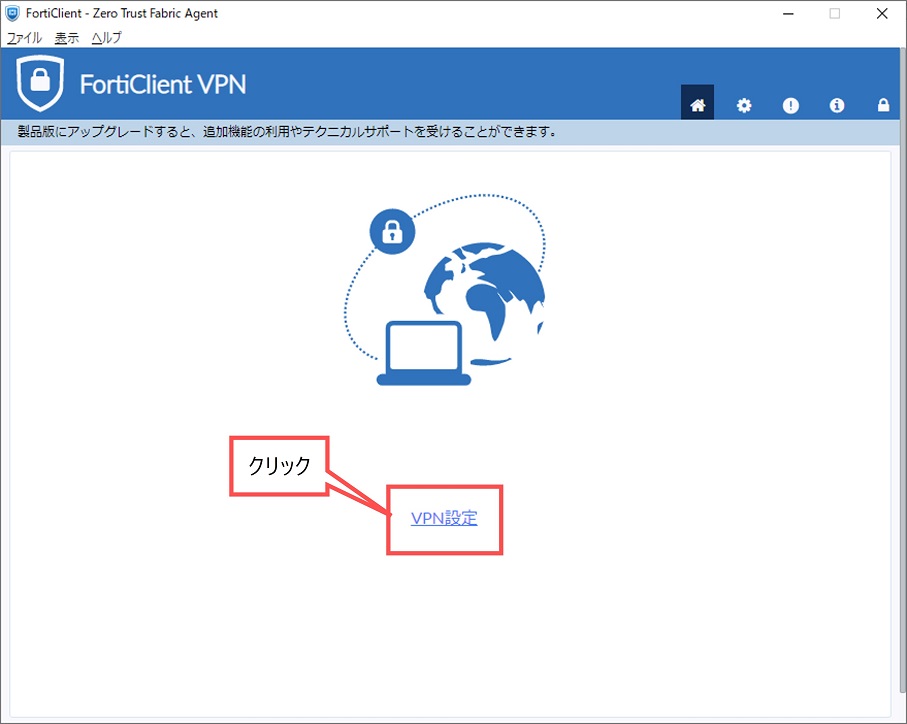
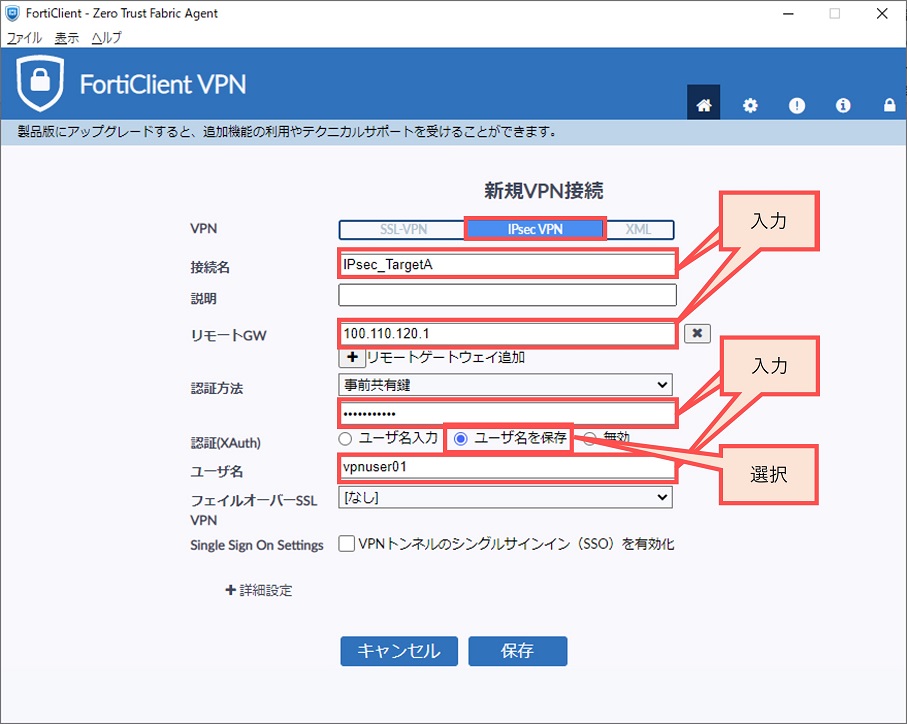
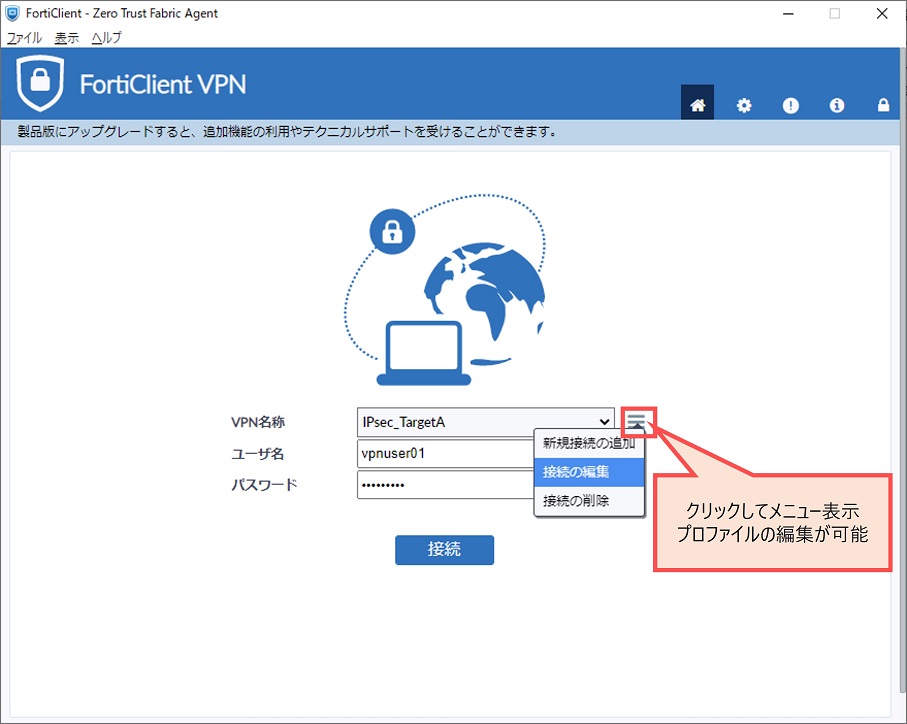
インストール後、FortiClient VPN を開き以下の手順で設定、接続します。
初回起動時に規約同意画面が表示されるため同意してください。
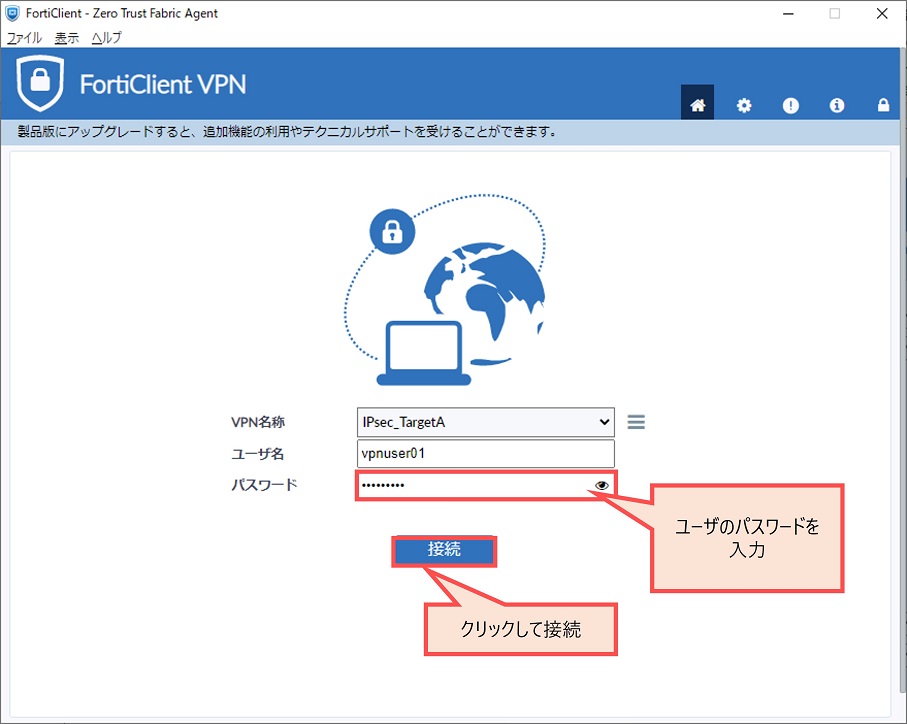
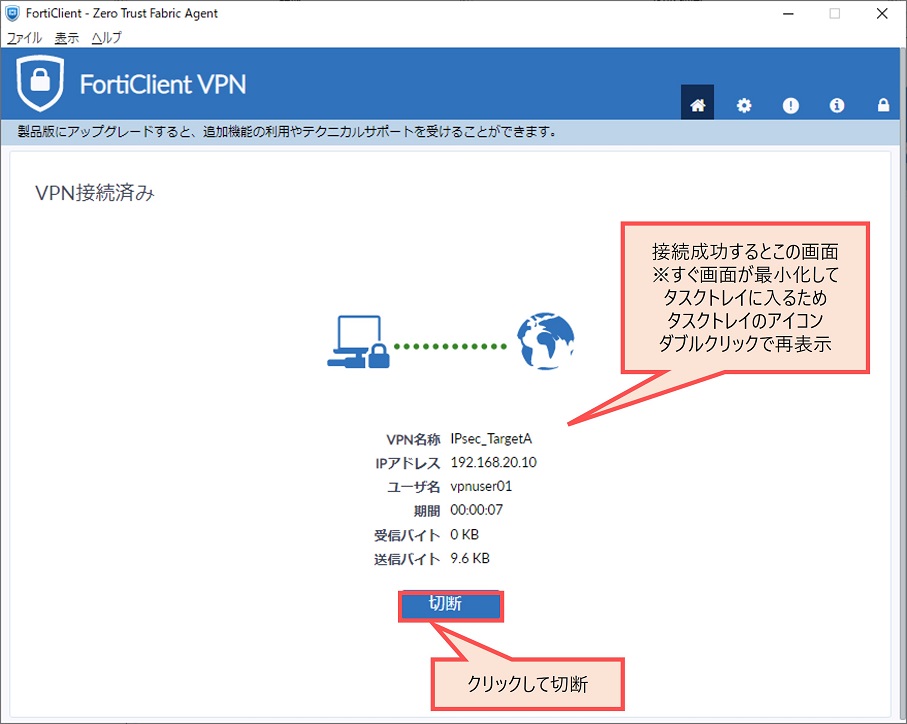
接続後、クライアントにてリモートネットワークへの疎通確認、スプリットトンネルで指定したネットワーク宛のルートがルーティングテーブルにインストールされていることなどを確認します。
状態確認
GUI での VPN ログ確認
[ログ&レポート > システムイベント] 画面にて右上のプルダウンで「VPNイベント」を選択すると VPN ログを確認できます。接続に成功した場合フェーズ1、フェーズ2 の success ログや、フェーズ2の up、tunnel の up などのログが出ます。

CLI 状態確認コマンド
- diagnose vpn ike gateway list
- フェーズ1トンネルの状態確認
FortiGate-60F # diagnose vpn ike gateway list

vd: root/0
name: RemoteVPN_01_0
version: 2
interface: wan1 5
addr: 100.110.120.1:500 -> 100.101.102.1:500
tun_id: 192.168.20.10/::10.0.0.4
remote_location: 0.0.0.0
network-id: 0
transport: UDP
created: 608s ago
eap-user: vpnuser01
2FA: no
peer-id: 10.1.10.33
peer-id-auth: no
FortiClient UID: FAB7675B582A4070876CA5EDC8BAD3D9
assigned IPv4 address: 192.168.20.10/255.255.255.0
pending-queue: 0
PPK: no
IKE SA: created 1/1  established 1/1  time 40/40/40 ms
IPsec SA: created 1/1  established 1/1  time 0/0/0 ms

  id/spi: 2 8fc13f98b8abc15b/0066ee058b31184e
  direction: responder
  status: established 608-608s ago = 40ms
  proposal: aes256-sha256
  child: no
  SK_ei: 492d50cf16fa91c9-01c50f6f27600db1-fd1dce97e6a4b29e-fc6961b69295d391
  SK_er: b35a143158fc4a35-aac8912e2475fbd1-01d35841c4e48a15-6825bf1a6b4ae709
  SK_ai: 29c5151134f6ada9-37e2e6b8ee9bb9ed-0bf596c8eeea74a8-378232fd631a2c97
  SK_ar: 1c9a335dd1b06ea6-c80a669b218981e6-c608b03222104ba2-429acae71f27a524
  PPK: no
  message-id sent/recv: 0/127
  QKD: no
  PQC-KEM (IKE): no
  PQC-KEM (all IPsec): no
  lifetime/rekey: 86400/85521
  DPD sent/recv: 00000000/00000000
peer-id: 10.1.10.33- diagnose vpn tunnel list
- フェーズ2トンネルの状態確認
FortiGate-60F # diagnose vpn tunnel list
list all ipsec tunnel in vd 0
------------------------------------------------------
name=RemoteVPN_01 ver=2 serial=1 100.110.120.1:0->0.0.0.0:0 nexthop=0.0.0.0 tun_id=10.0.0.1 tun_id6=::10.0.0.1 status=up dst_mtu=0 weight=1
bound_if=5 real_if=0 lgwy=static/1 tun=intf mode=dialup/2 encap=none/552 options[0228]=npu frag-rfc  role=primary accept_traffic=1 overlay_id=0

proxyid_num=0 child_num=1 refcnt=3 ilast=42967607 olast=42967607 ad=/0
stat: rxp=625 txp=1292 rxb=99706 txb=19596
dpd: mode=on-demand on=-1 status=ok idle=20000ms retry=3 count=0 seqno=0
natt: mode=none draft=0 interval=0 remote_port=0
fec: egress=0 ingress=0
------------------------------------------------------
name=RemoteVPN_01_0 ver=2 serial=4 100.110.120.1:0->100.101.102.1:0 nexthop=100.110.120.2 tun_id=192.168.20.10 tun_id6=::10.0.0.4 status=up dst_mtu=1500 weight=1
bound_if=5 real_if=5 lgwy=static/1 tun=intf mode=dial_inst/3 encap=none/8872 options[22a8]=npu rgwy-chg frag-rfc  run_state=0 role=primary accept_traffic=1 overlay_id=0

parent=RemoteVPN_01 index=0
proxyid_num=1 child_num=0 refcnt=5 ilast=51 olast=51 ad=/0
stat: rxp=395 txp=1292 rxb=57222 txb=19596
dpd: mode=on-demand on=1 status=ok idle=20000ms retry=3 count=0 seqno=2
natt: mode=none draft=0 interval=0 remote_port=0
fec: egress=0 ingress=0
proxyid=RemoteVPN_01 proto=0 sa=1 ref=2 serial=1 add-route
  src: 0:0.0.0.0-255.255.255.255:0
  dst: 0:192.168.20.10-192.168.20.10:0
  SA:  ref=6 options=6a6 type=00 soft=0 mtu=1438 expire=42535/0B replaywin=2048
       seqno=50b esn=0 replaywin_lastseq=00000107 qat=0 rekey=0 hash_search_len=1
  life: type=01 bytes=0/0 timeout=43187/43200
  dec: spi=c442fc81 esp=aes key=16 b6e9a3541660086df68076f5baeae9e4
       ah=sha1 key=20 65e4d36120cb354ababf945f8a43c9e957b7e17d
  enc: spi=9ba5b5a6 esp=aes key=16 dd8910cf1fde9a43db112848e77863ea
       ah=sha1 key=20 6b5c33969ba31ba80c2590296b4d376277826bd2
  dec:pkts/bytes=398/57612, enc:pkts/bytes=1298/20316
  npu_flag=03 npu_rgwy=100.101.102.1:0 npu_lgwy=100.110.120.1:0 npu_selid=2
  dec_npuid=1 enc_npuid=1 dec_engid=0 enc_engid=0 dec_saidx=7 enc_saidx=6
オプションデザインパターン
ここまでの内容はリモートアクセスVPNの基本的な設定方法です。
本項目では案件の要件次第で必要になりそうなデザインパターンを整理します。
ユーザグループ別に許可する接続先ネットワークを分ける
トンネル設定一つに対して複数のユーザグループを紐づけ、ユーザグループごとに接続できるネットワークを変えることを考えます。
この要件に対して必要な設定は以下の通りです。
- IPsec フェーズ1 設定
- ファイアウォールポリシー設定
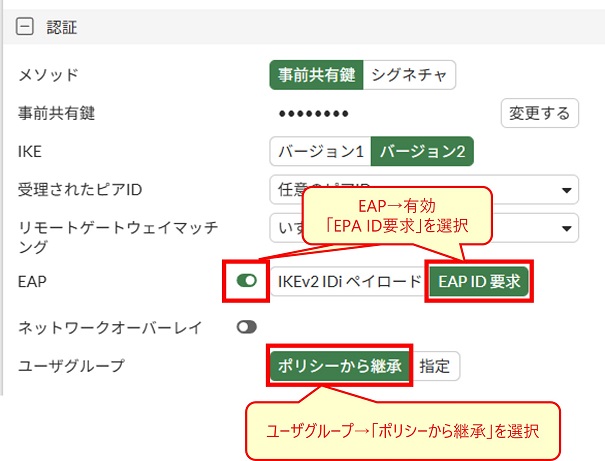
① IPsec フェーズ1 設定
- EAP → 有効、「EAP ID要求」を選択
- ユーザグループ
- 「指定」ではなく「ポリシーから継承」を選択
- CLI の場合は
unset authusrgrpでユーザグループの指定を未設定に戻す
CLI で設定する場合は以下のコマンドに該当します。
config vpn ipsec phase1-interface
    edit "トンネル名"
        set eap enable
        set eap-identity send-request
        unset authusrgrp
    next
end
② ファイアウォールポリシー設定
ファイアウォールポリシー設定で「ユーザ/グループ」に該当するユーザグループを指定します。これにより指定したユーザグループに含まれるユーザで IPsec VPN 接続した場合のみに合致するという動作になります。
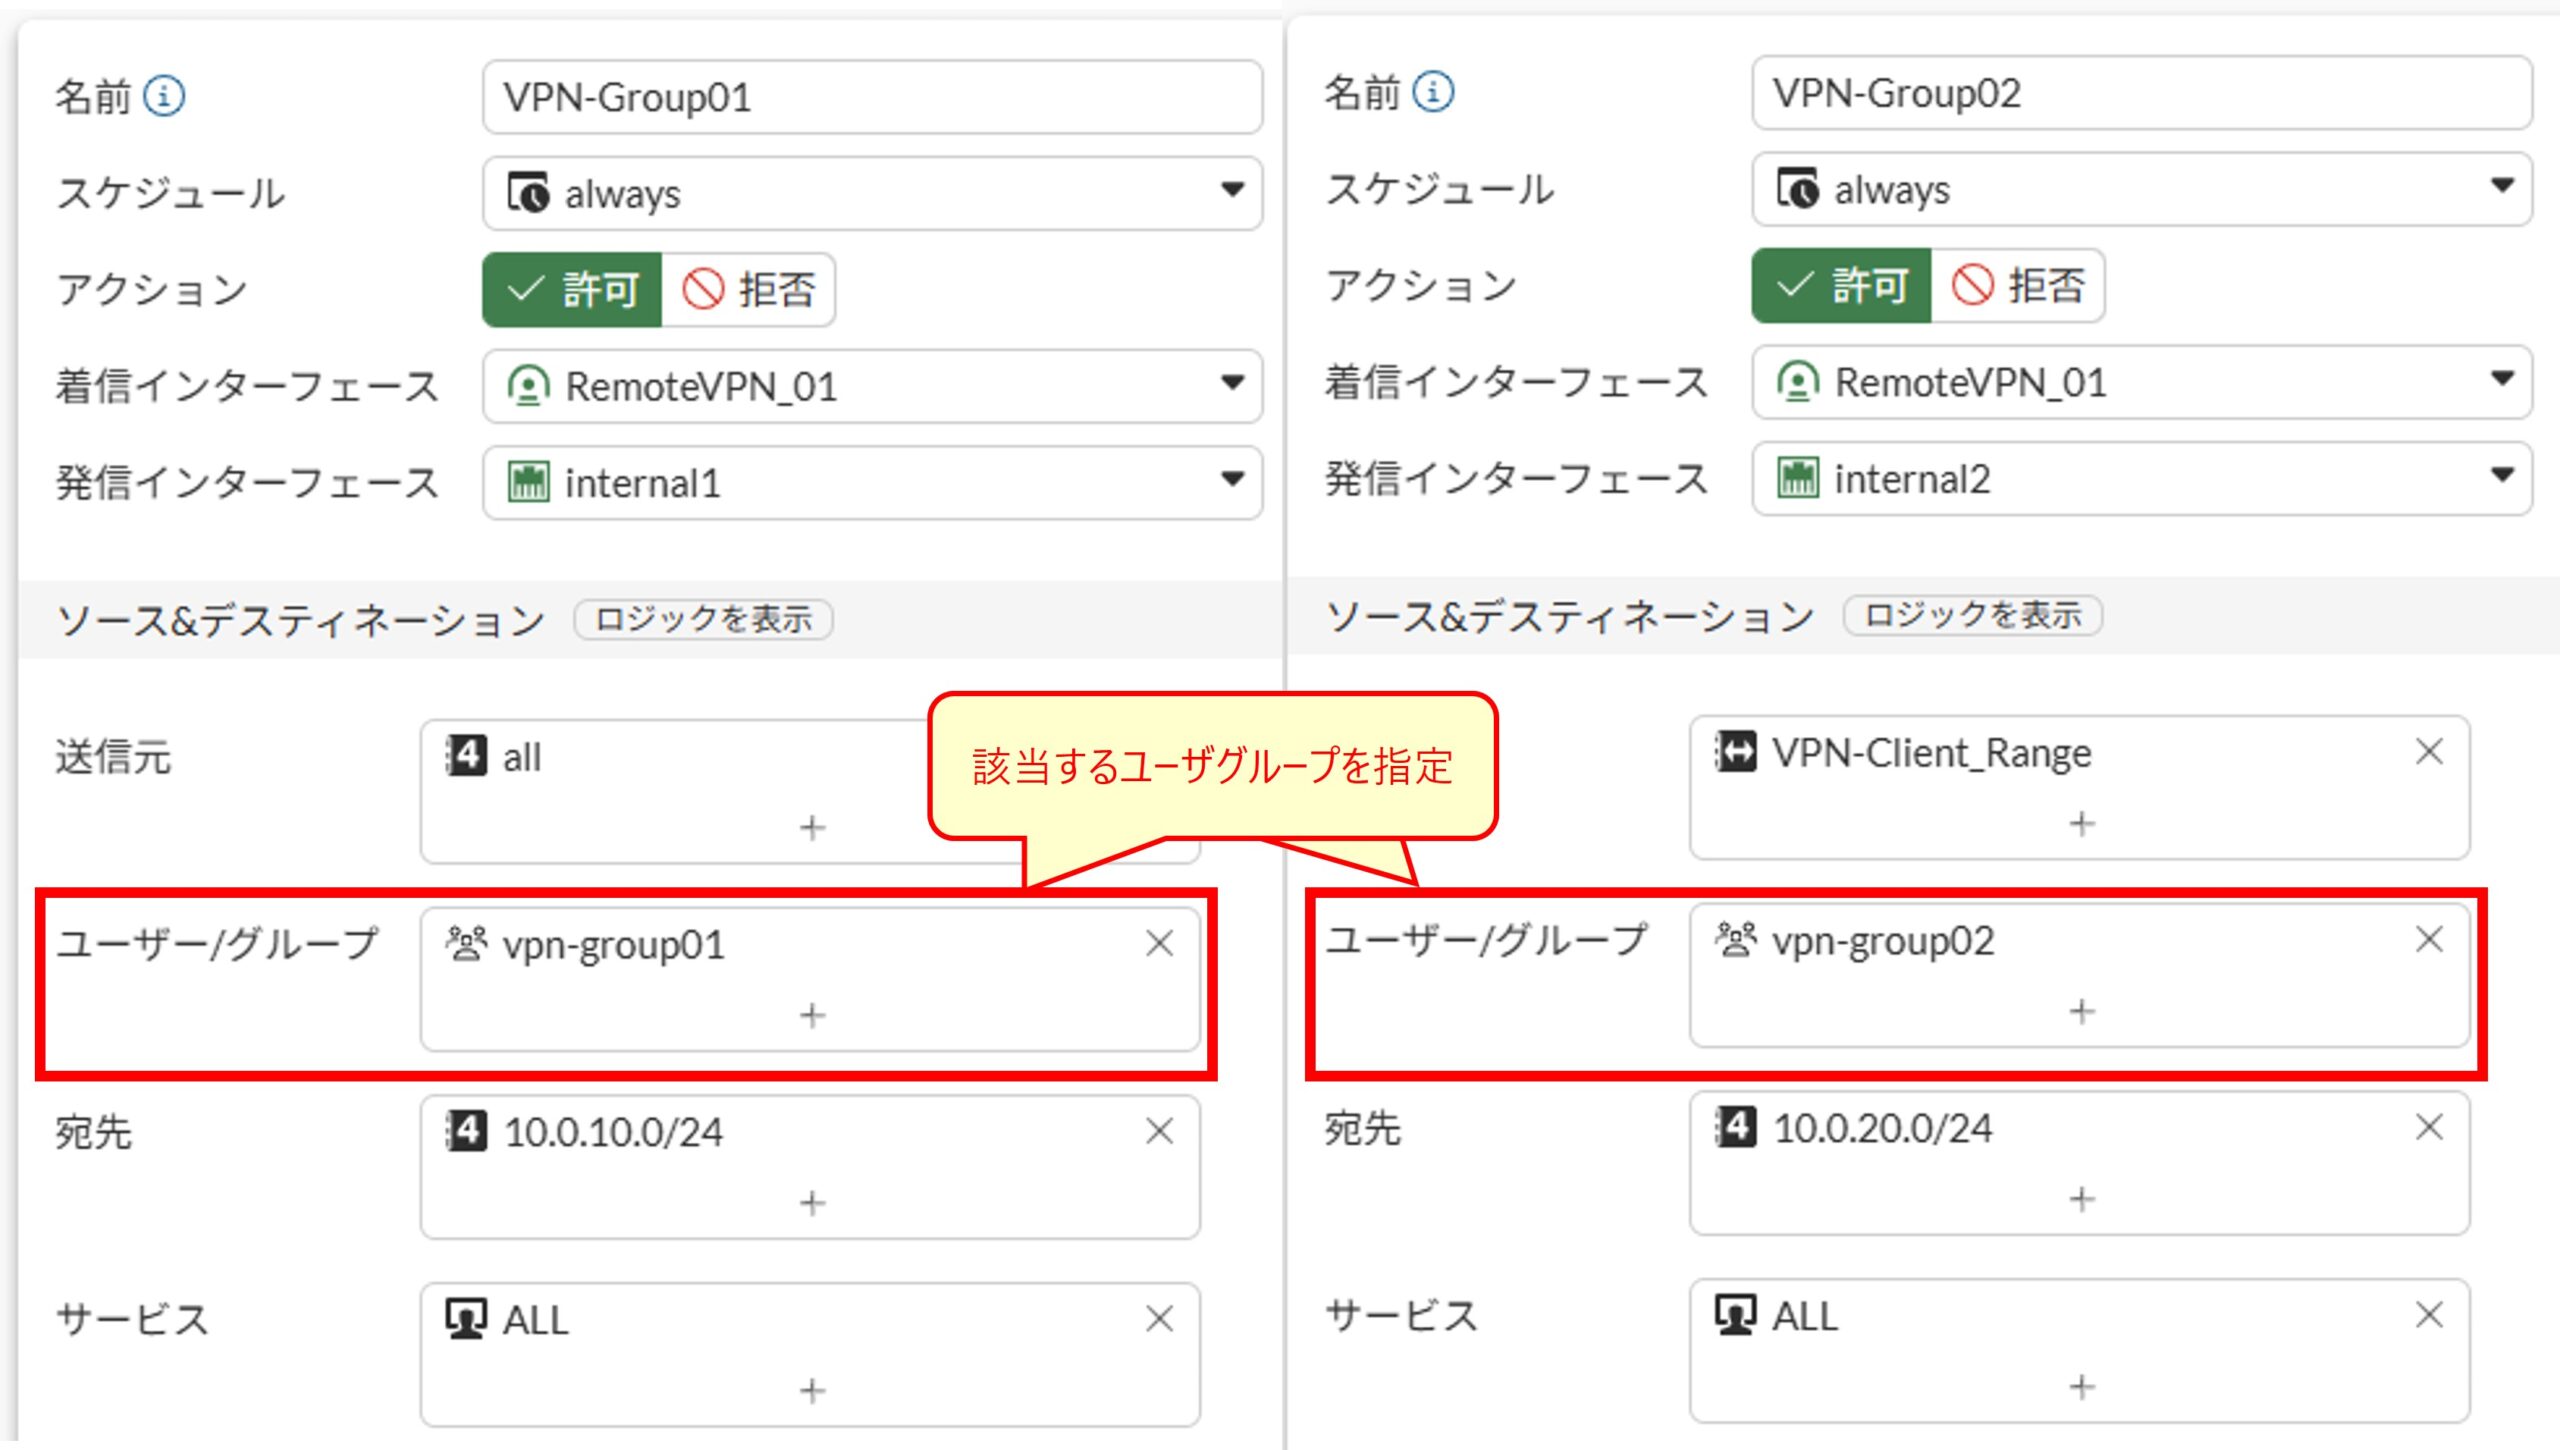
CLI で設定する場合はファイアウォールポリシー設定内のset groupsでユーザグループを指定します。
config firewall policy
    edit 1
        set name "VPN-Group01"
        set srcintf "RemoteVPN_01"
        set dstintf "internal1"
        set action accept
        set srcaddr "all"
        set dstaddr "10.0.10.0/24"
        set schedule "always"
        set service "ALL"
        set logtraffic all
        set groups "vpn-group01"
    next
    edit 2
        set name "VPN-Group02"
        set srcintf "RemoteVPN_01"
        set dstintf "internal2"
        set action accept
        set srcaddr "VPN-Client_Range"
        set dstaddr "10.0.20.0/24"
        set schedule "always"
        set service "ALL"
        set logtraffic all
        set groups "vpn-group02"
    next
end
VPN 接続後一定時間で自動切断させる
VPN 接続後、一定時間経過したら VPN 接続を自動で切断し、再接続するためには再認証が必要になるという動作にすることができます。このためには IPsec フェーズ1 のキー有効時間を要件の一定時間に合わせて設定し、かつ再認証を有効に設定します。
再認証の有効・無効設定は CLI でのみ可能なためキー有効時間も含めて CLI で設定します。
以下は10時間(36,000秒)経過したら自動切断させるための設定例です。
config vpn ipsec phase1-interface
    edit "トンネル名"
        set keylife 36000
        set reauth enable
    next
end
FortiClient VPN 側のフェーズ1キー有効期間は動作に影響しません。FortiClient VPN側のキー有効期間が FortiGate 側のキー有効期間より長い場合でも、FortiGate 側の設定に基づいて自動切断されます。
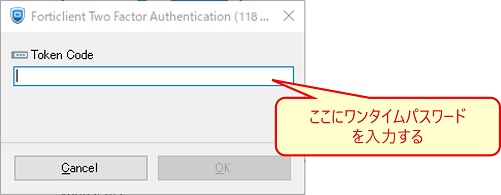
ユーザ認証にEメールによるワンタイムパスワードを追加する
ローカルユーザに Eメール情報を設定し、VPN 接続時に Eメールに送付されるワンタイムパスワード (認証コード) を送付して認証のためにそれを入力させる、という動作にすることができます。
ワンタイムパスワードを設定した場合、FortiClient VPN でユーザ認証時に以下画面が追加的に表示されます。
設定方法は SSL-VPN における設定方法と全く同じであるため、以下の記事を参考にしてください。

VPN 接続元アドレスを日本のアドレスに制限する
サイバー攻撃の多くは海外から行われているため、VPN 接続元を日本のアドレスに制限したいという要件が良くあります。IPsec VPN の通信は ForiGate 宛の通信となるため、ローカルインポリシーで制御します。
日本のアドレスはジオグラフィ(geography)タイプのアドレスオブジェクトを作成することで表現できます。また IPsec VPN のサービスはトランスポートを UDP にしている場合は UDP/500 と UDP/4500 が該当し、ForiGate のビルトインサービスの「IKE」が該当するためこれを使用できます。
ジオグラフィタイプのアドレスはライセンスなしでも使用できますが、最新のアドレスリストを使用するためには FortiCare ライセンスとクラウドアクセスが必要なため注意してください。
ローカルインポリシーの設定方法については以下の記事を参考にしてください。

ユーザ当たりの同時接続数を制限する
複数端末で同じユーザを使用して同時接続することを制限したいという要件がある場合があります。
しかし、少なくとも FortiOS 7.6.6 以前のバージョンにおいては IPsec VPN でユーザ当たりの同時接続数を制限する機能が存在しないため、この要件には応えることができません。
現在、FortiOS では IPsec VPN ユーザーの同時接続数を 1 つに制限する機能はサポートされていません。同じユーザーが複数のエンドポイントから認証および接続した場合、両方の IPsec VPN 接続が同時に維持されます。(※翻訳文章)
Technical Tip: IPsec Remote access VPN permits multiple connections from the same user
将来のバージョンで機能追加される可能性はあるため、必要な場合は公式リリース情報を注視してください。
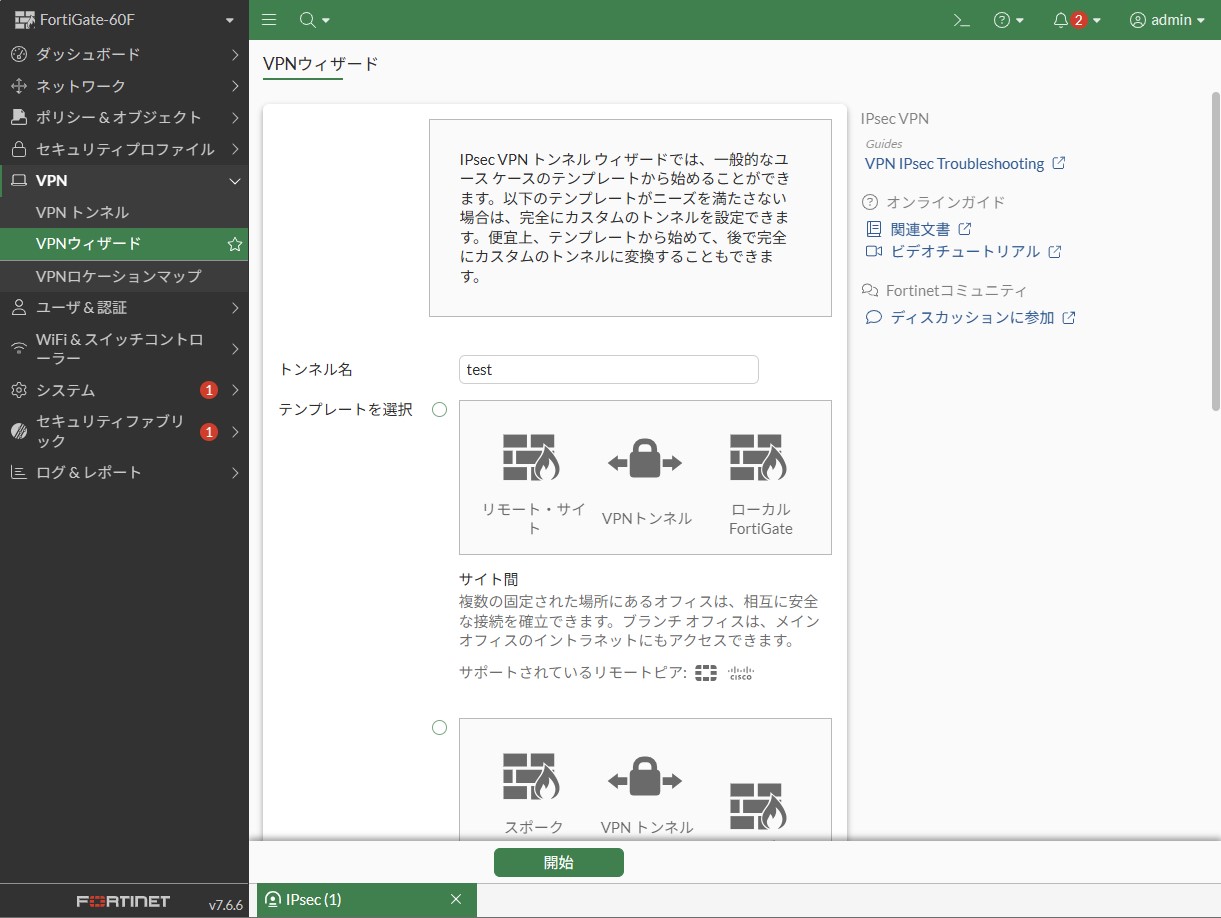
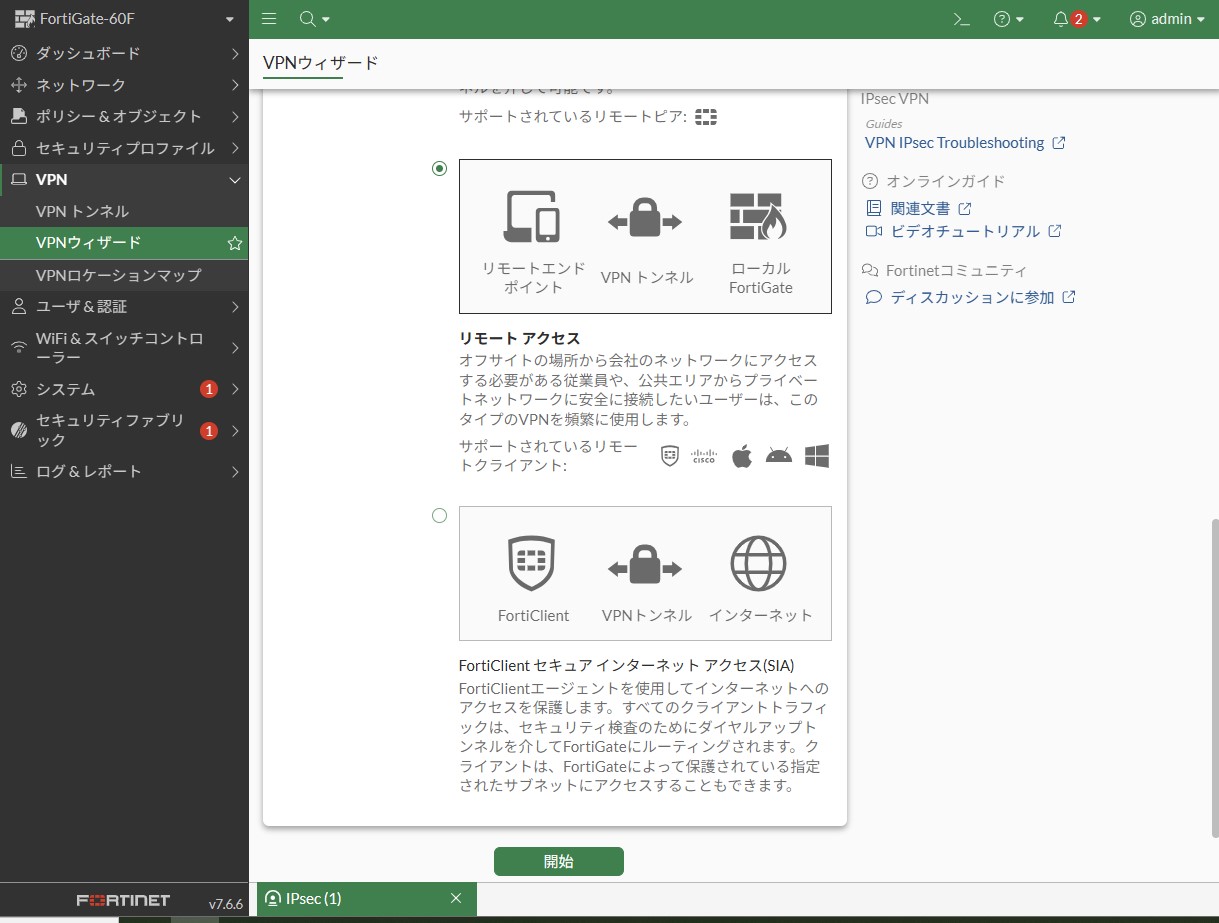
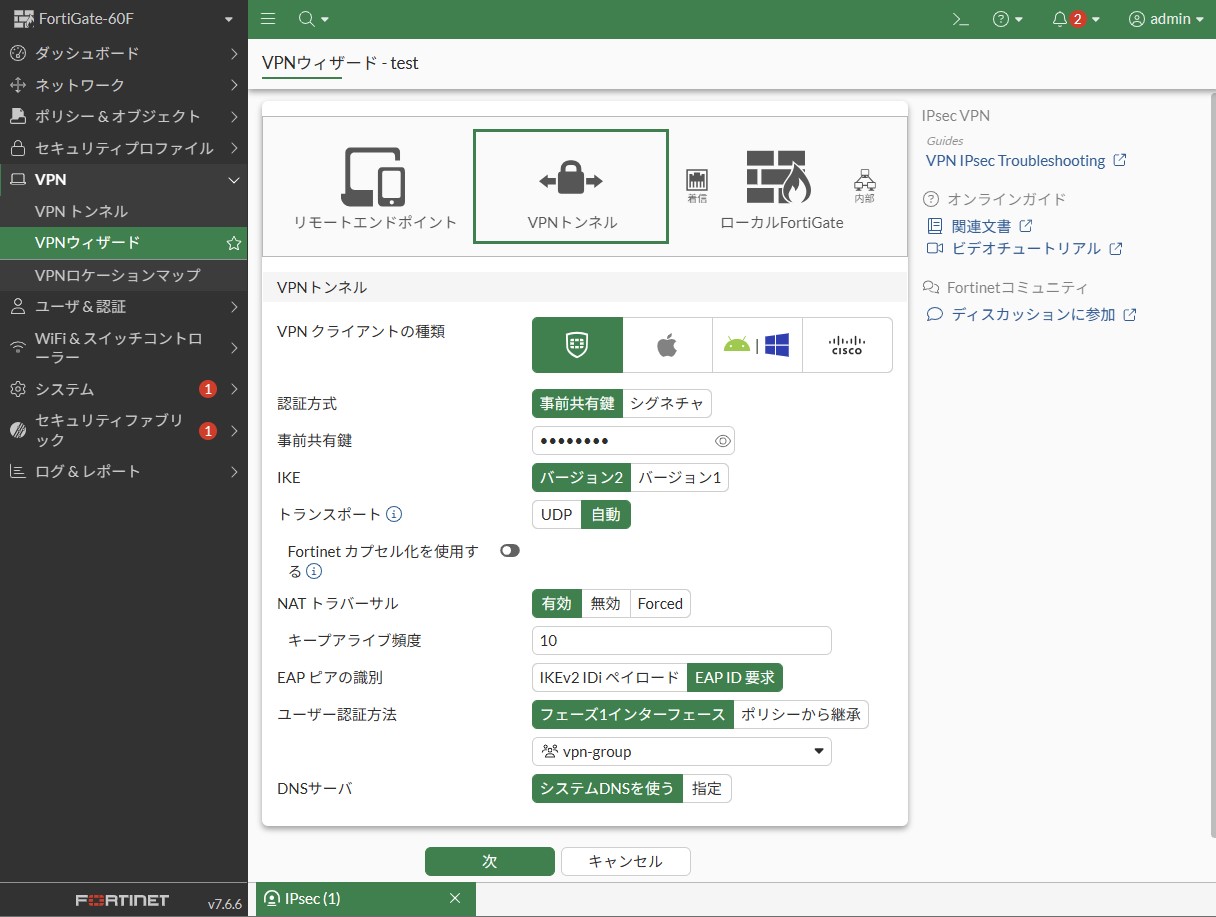
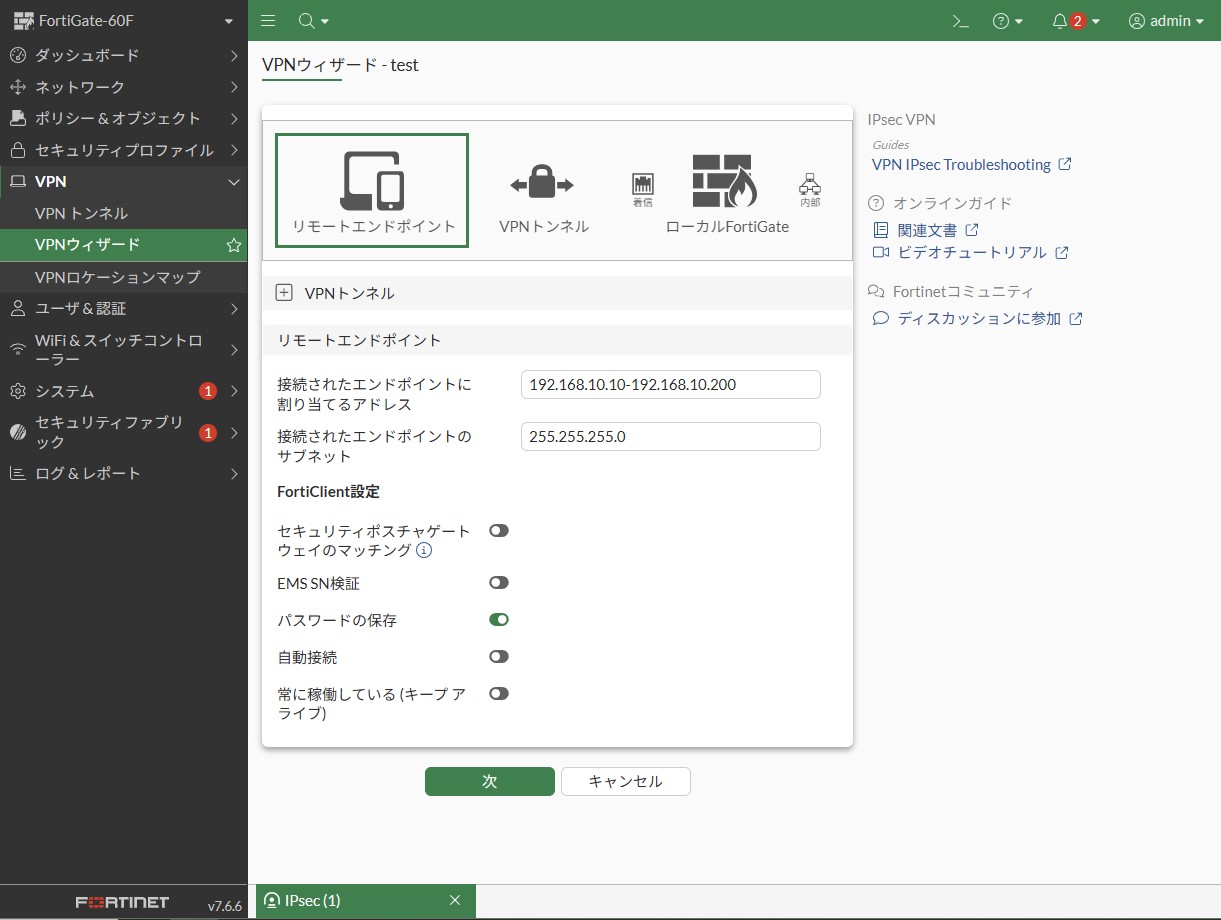
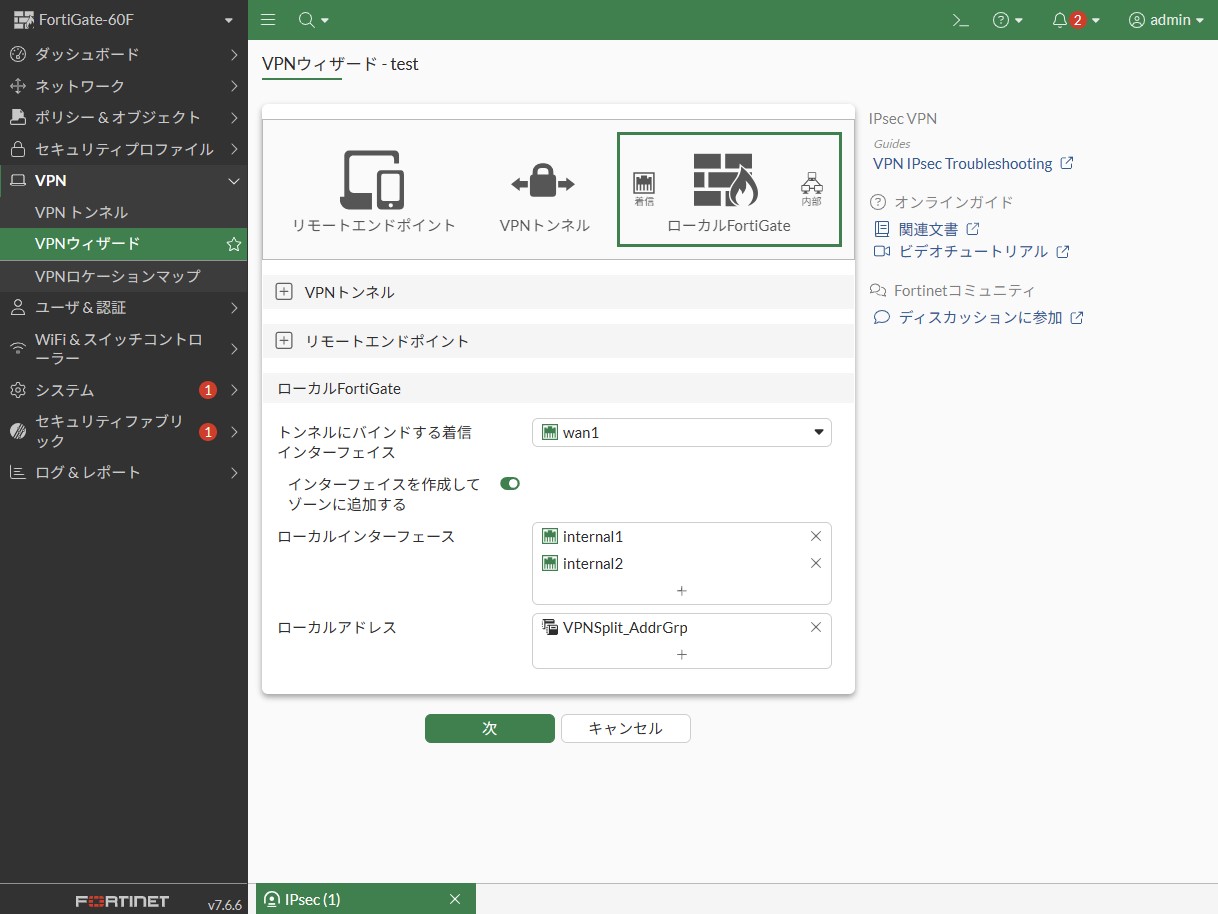
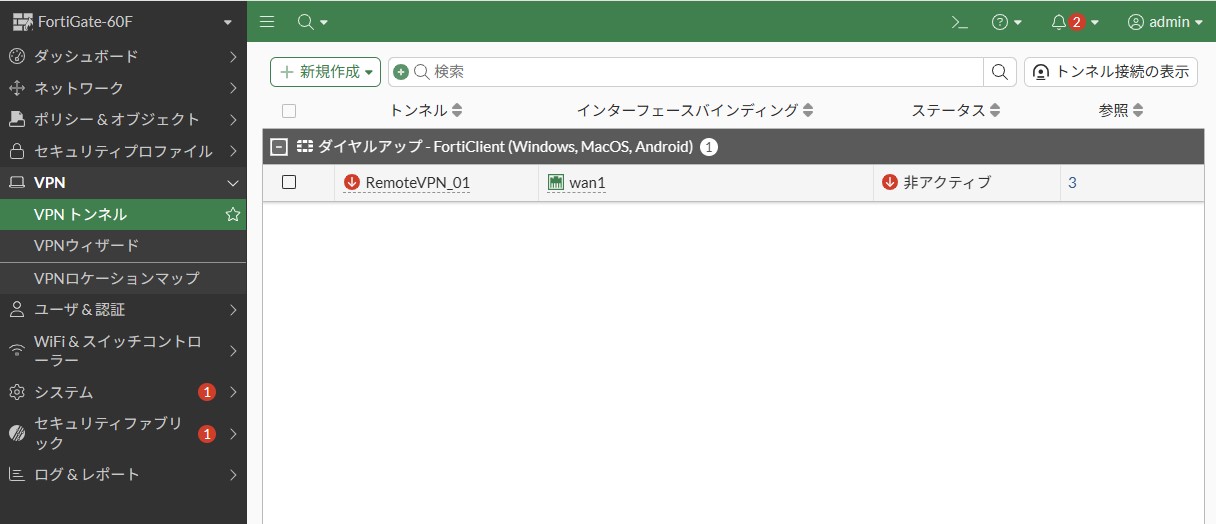
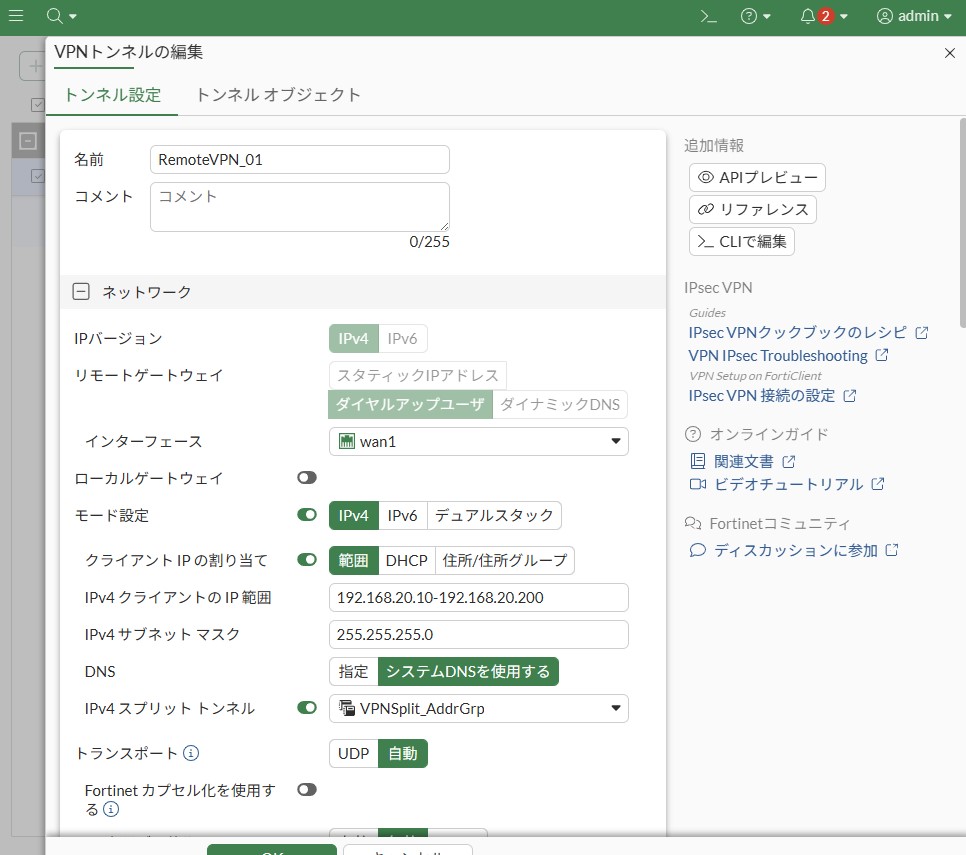
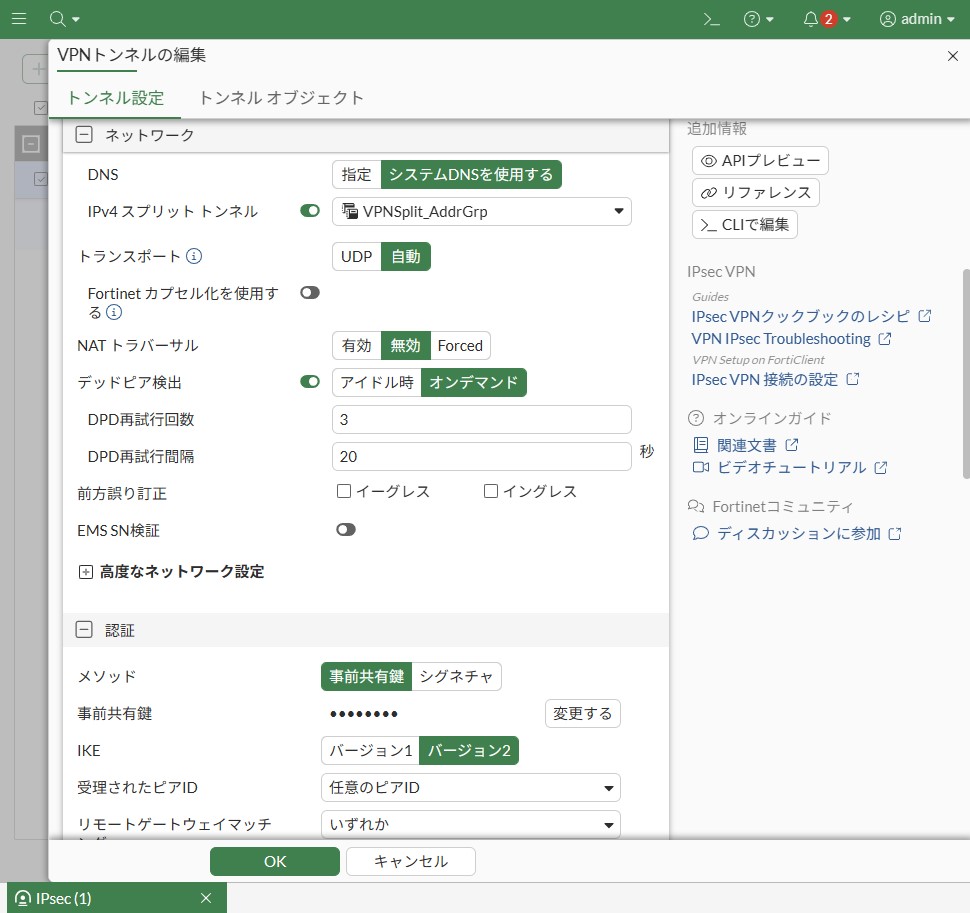
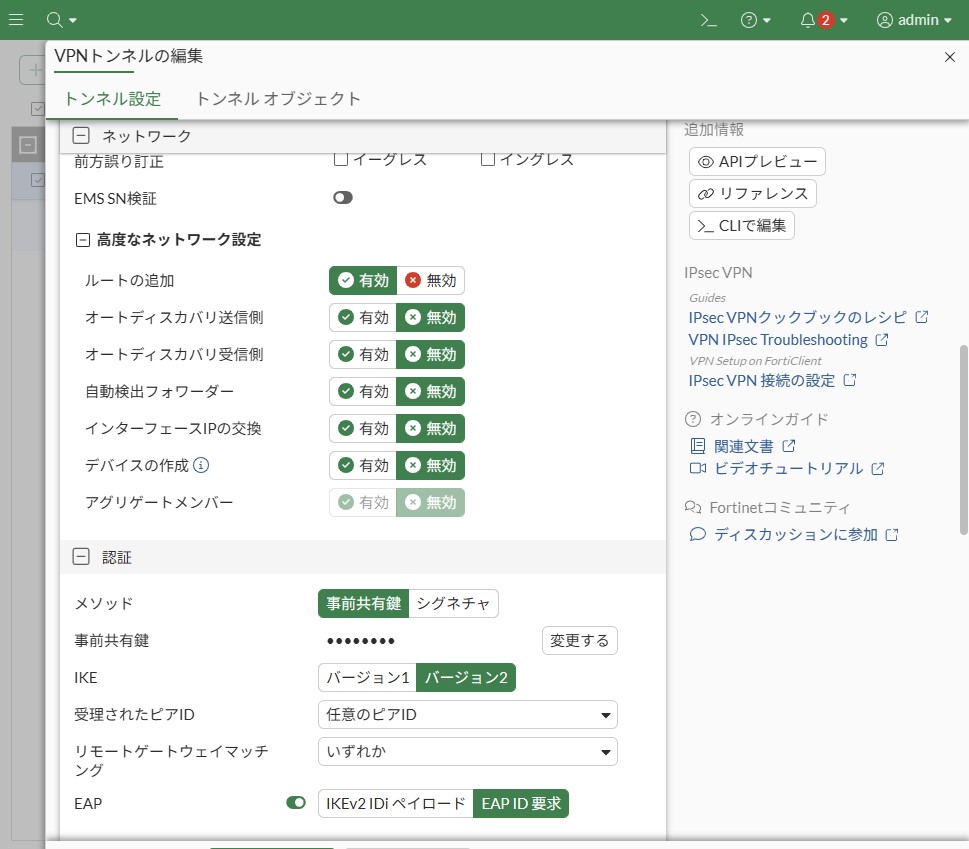
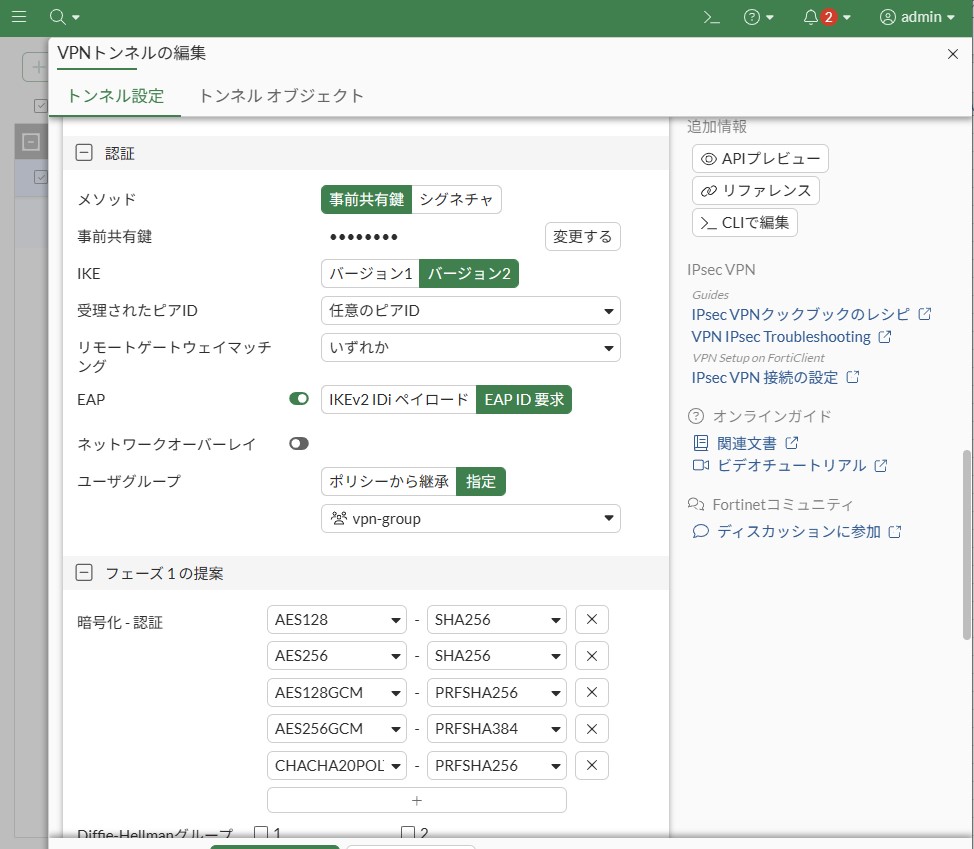
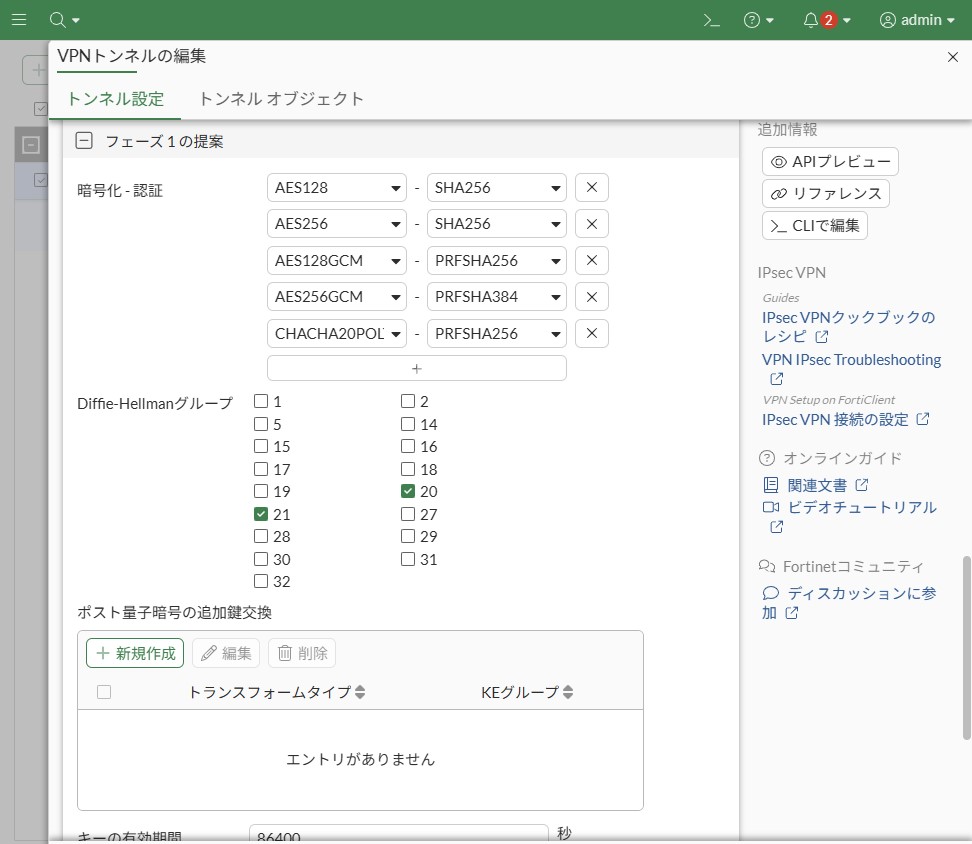
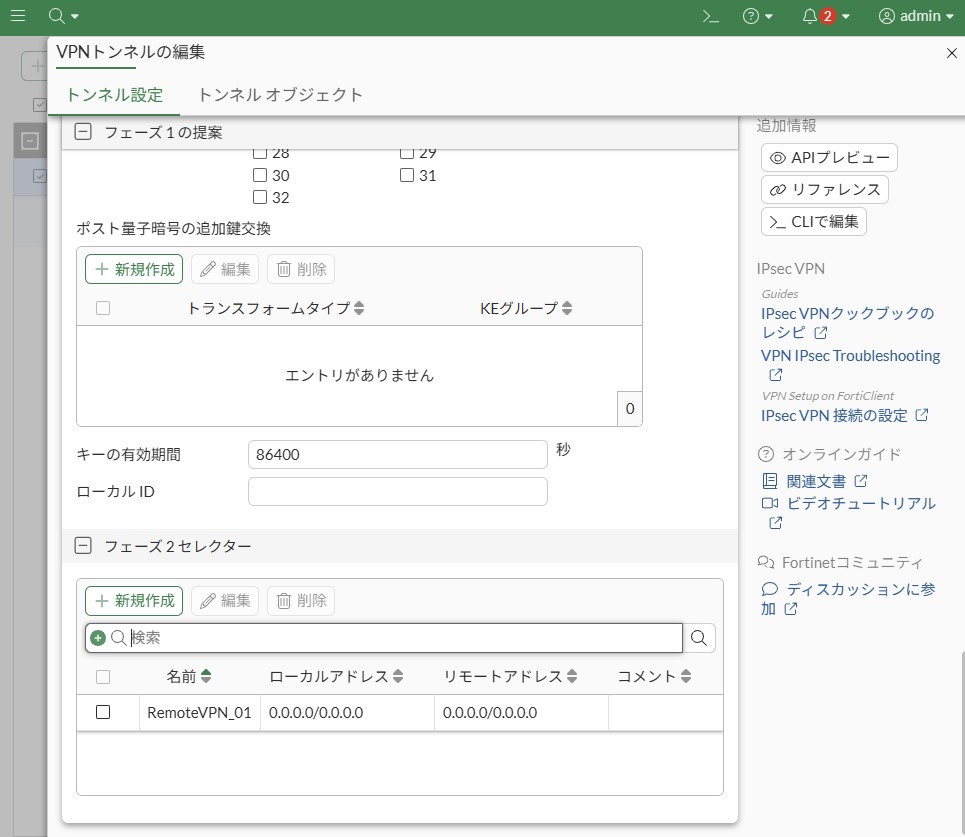
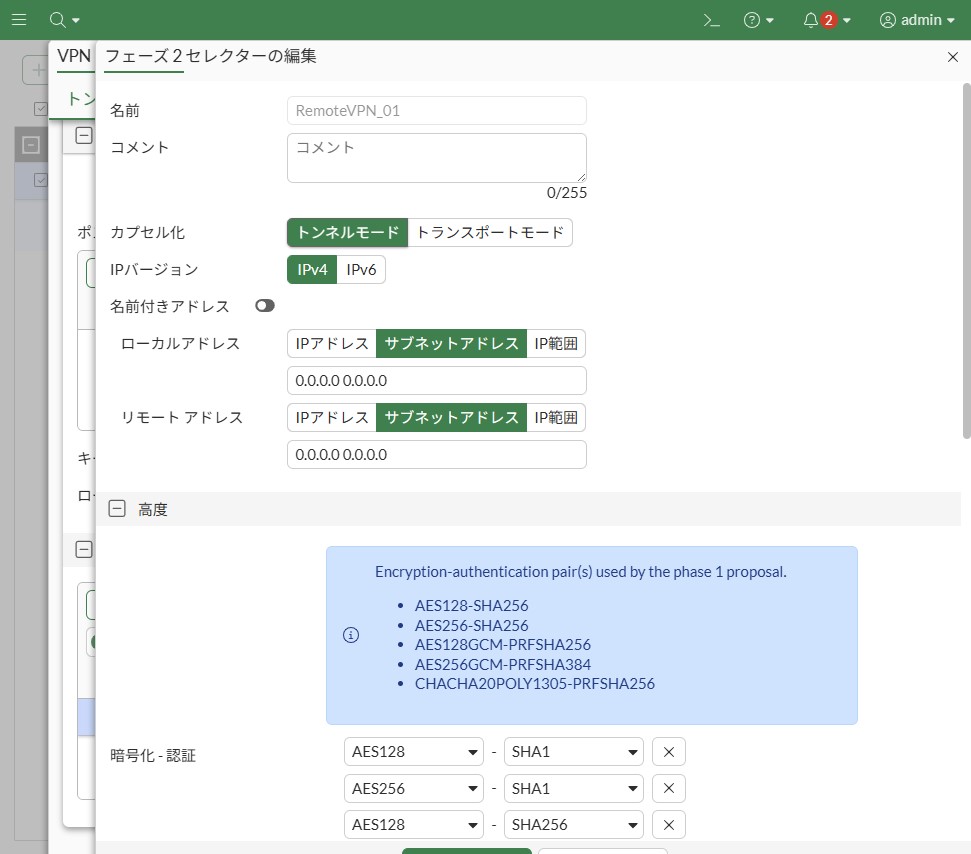
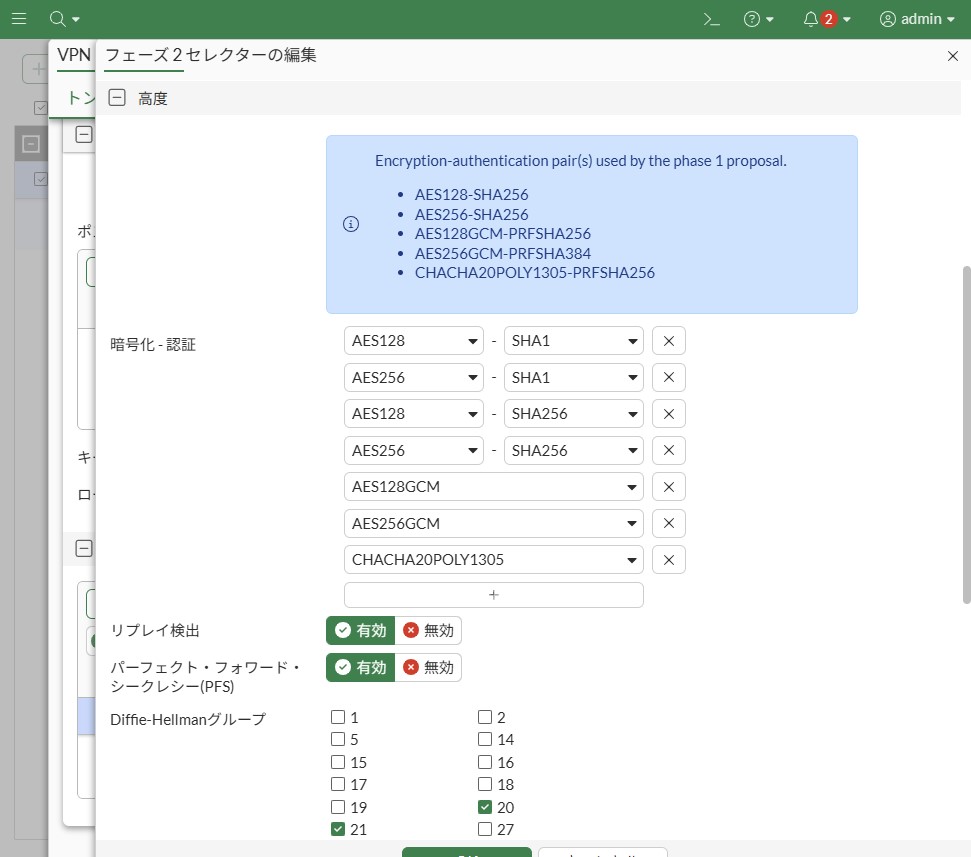
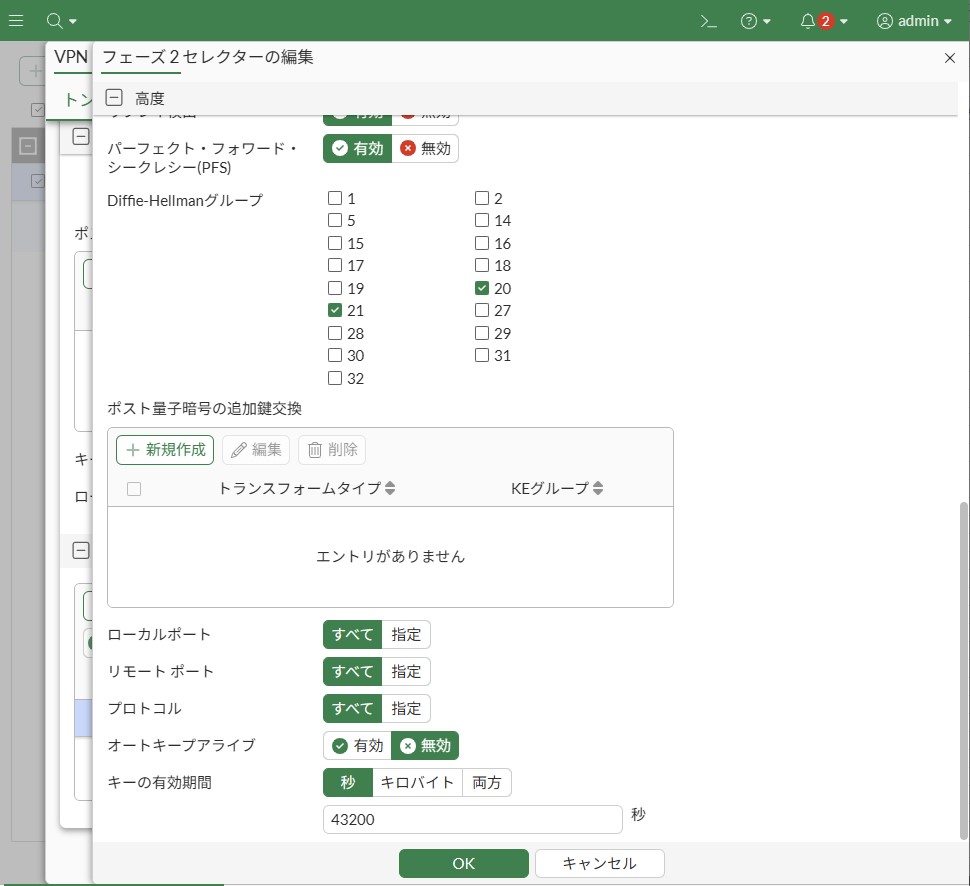
付録:GUI の IPsec VPN 設定画面
VPNウィザード画面
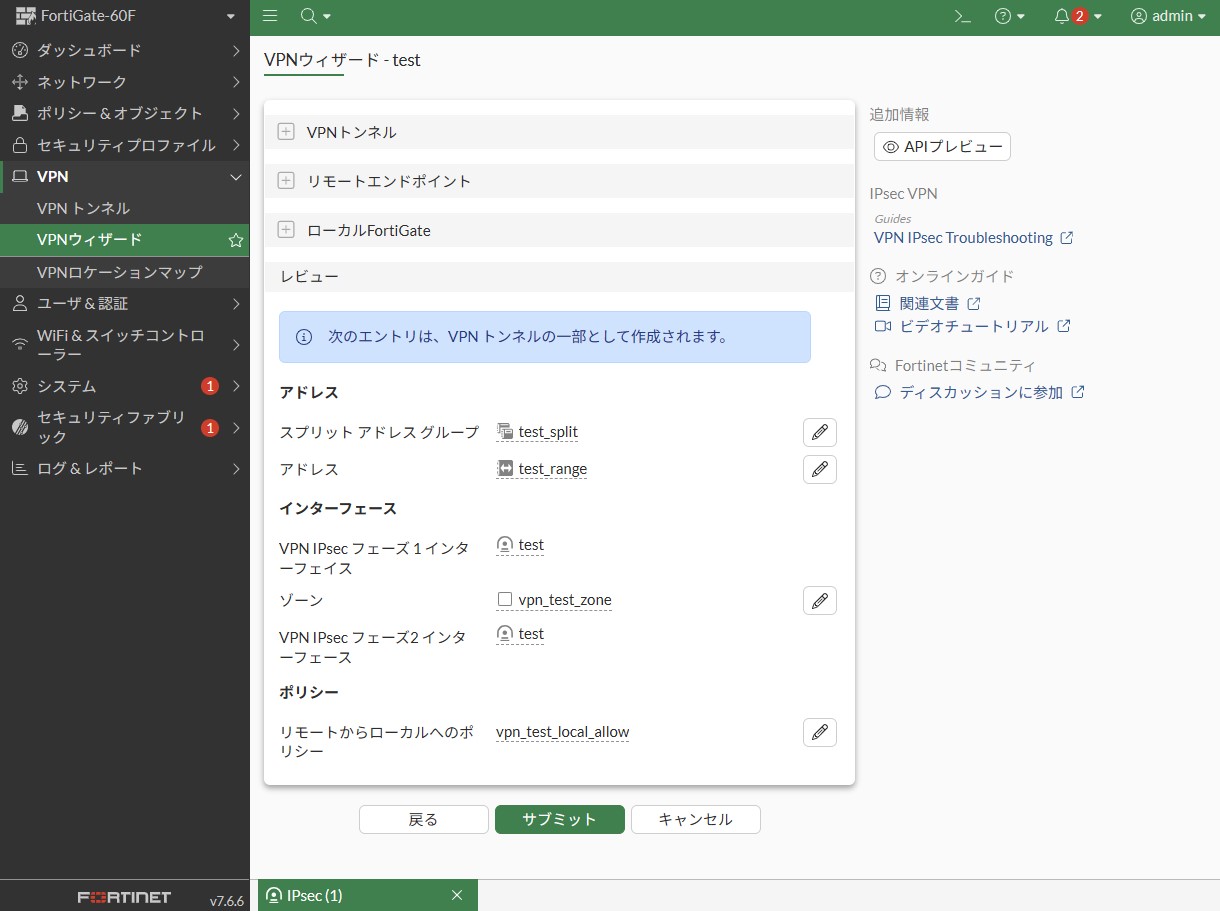
VPNトンネル画面
参考資料
- 管理者ガイド
- 日本語設定ガイド
- FortiClient VPN
- コミュニティ情報
- https://community.fortinet.com/t5/FortiGate/Troubleshooting-Tip-IPsec-Tunnel-is-not-coming-up-due-to-the/ta-p/387036
- https://community.fortinet.com/t5/FortiGate/Technical-Tip-Understanding-the-net-device-feature-in-FortiGate/ta-p/379460
- https://community.fortinet.com/fortigate-3/technical-tip-using-group-based-firewall-policy-for-dial-up-vpn-to-restrict-network-access-99648
- https://community.fortinet.com/fortigate-3/technical-tip-procedure-to-add-multiple-user-group-in-xauth-in-dial-up-ipsec-vpn-configuration-95361
- https://community.fortinet.com/fortigate-3/technical-tip-restrict-ipsec-vpn-access-to-certain-countries-94688
- https://community.fortinet.com/fortigate-3/technical-tip-hard-timeout-for-dial-up-ipsec-vpn-tunnel-180960
- https://community.fortinet.com/fortigate-3/technical-tip-ipsec-remote-access-vpn-permits-multiple-connections-from-the-same-user-100050
- CLIリファレンス
【おすすめ】FortiGate の設計構築中なら以下の記事も役立つかもです
- 基礎知識
- HA (冗長構成) 設定
- FortiGate HA モードの Active-Passive と Active-Active の違いを解説します
- FortiGate HA(冗長構成)の概要と設定ガイド【詳しく解説】※note記事
- FortiGate HA 構成時のコンフィグ同期の仕様について解説します
- FortiGate HA 構成時の NTP,Syslog,SNMP 等の送信元インターフェースを解説 [ha-direct 設定]
- FortiGate HA 構成時の仮想 MAC アドレスについて解説します
- FortiGate HA ハートビート送信間隔と障害判定しきい値の設定ガイド
- FortiGate HA 構成時のバックアップ及びリストア実施ガイド
- FortiGate HA 構成でのモニタインターフェースダウン時の通信断時間について解説
- FortiGate HA 構成に関するQ&A 【良くありそうな疑問集】
- FortiGate で override が無効なのにフェイルバックが発生する理由 ※note記事
- VDOM (バーチャルドメイン) 設定
- トランスペアレントモード設定
- システム系設定
- 管理者アカウント設定
- 時刻・NTP 設定
- ロギング・Syslog 送信設定
- SNMP 設定
- DHCP サーバ機能設定
- Proxy サーバ機能設定
- アラートメール送信
- ネットワーク系設定
- インターフェース設定
- ルーティング設定
- DNS 設定
- NAT 及び NAPT 設定
- ファイアウォール系設定
- アドレス設定
- サービス設定
- ファイアウォールポリシー設定
- ゾーンを使用したポリシー設定
- VPN 系設定
- SSL-VPN 設定
- IPsec VPN 設定
- Tips
- NCA (Network Construction Assistant)
Amazon アフィリエイトリンク
以下は Amazon アフィリエイトリンクです。インフラエンジニアにそこそこおすすめなアイテムです。


コメント